
MacVideo provides the ability to create quizzes for your videos.
The types of quiz questions available are:
- Multiple choice (question with only one correct answer, 180 character limit for question)
- True/False (a question with only 2 options: true or false, 450 character limit for question)
- Reflection point (a video pause combined with text, not graded)
- Open-ended question (answer the questions with your own words, not graded, 270 character limit)
To get your quiz results, you can view them in the analytics page of the video. Important to note, your viewers will need to be logged into MacVideo for the quiz results to be tracked. MacVideo video quizzes also have the capability to be integrated into the gradebook within Avenue to Learn. If you’d like your quizzes to be graded within Avenue to Learn, see the tutorial on that here.
Our recommendations for the use of video quizzes would be for short knowledge checks or participation checkpoints. If you need deep, thorough assessment, it would be worthwhile to look at other assessment options in your course. The best workflow for video quizzes in MacVideo is to consider the entire video as a quiz item with questions placed throughout different times within the video rather than having multiple consecutive questions all in one section. The questions within the quiz editor do not stack, so you will need to add time in between questions. There are limitations on video quizzes. Please make sure you do a thorough testing of the features before you plan on implementing video quizzes within your course. All the features of the video quiz are not fully accessible for screen readers so always make sure to provide alternatives for those who need them.
Because MacVideo quizzes are completely browser based some students may experience issues viewing video quizzes depending on their browser settings. Make sure to provide your students with instructions on how to enable cookies and cross-site tracking. See the tutorial here.
To create a video quiz follow the steps below:
If you prefer to watch a video tutorial view this tutorial by Kaltura.
Creating a Video Quiz
To create a quiz
- Select Add New > Video Quiz.
The Editor / Media Selection page is displayed. - Click Select next to an existing media you want to create a Quiz from or, click Upload New Media, to upload a new media for your Quiz.
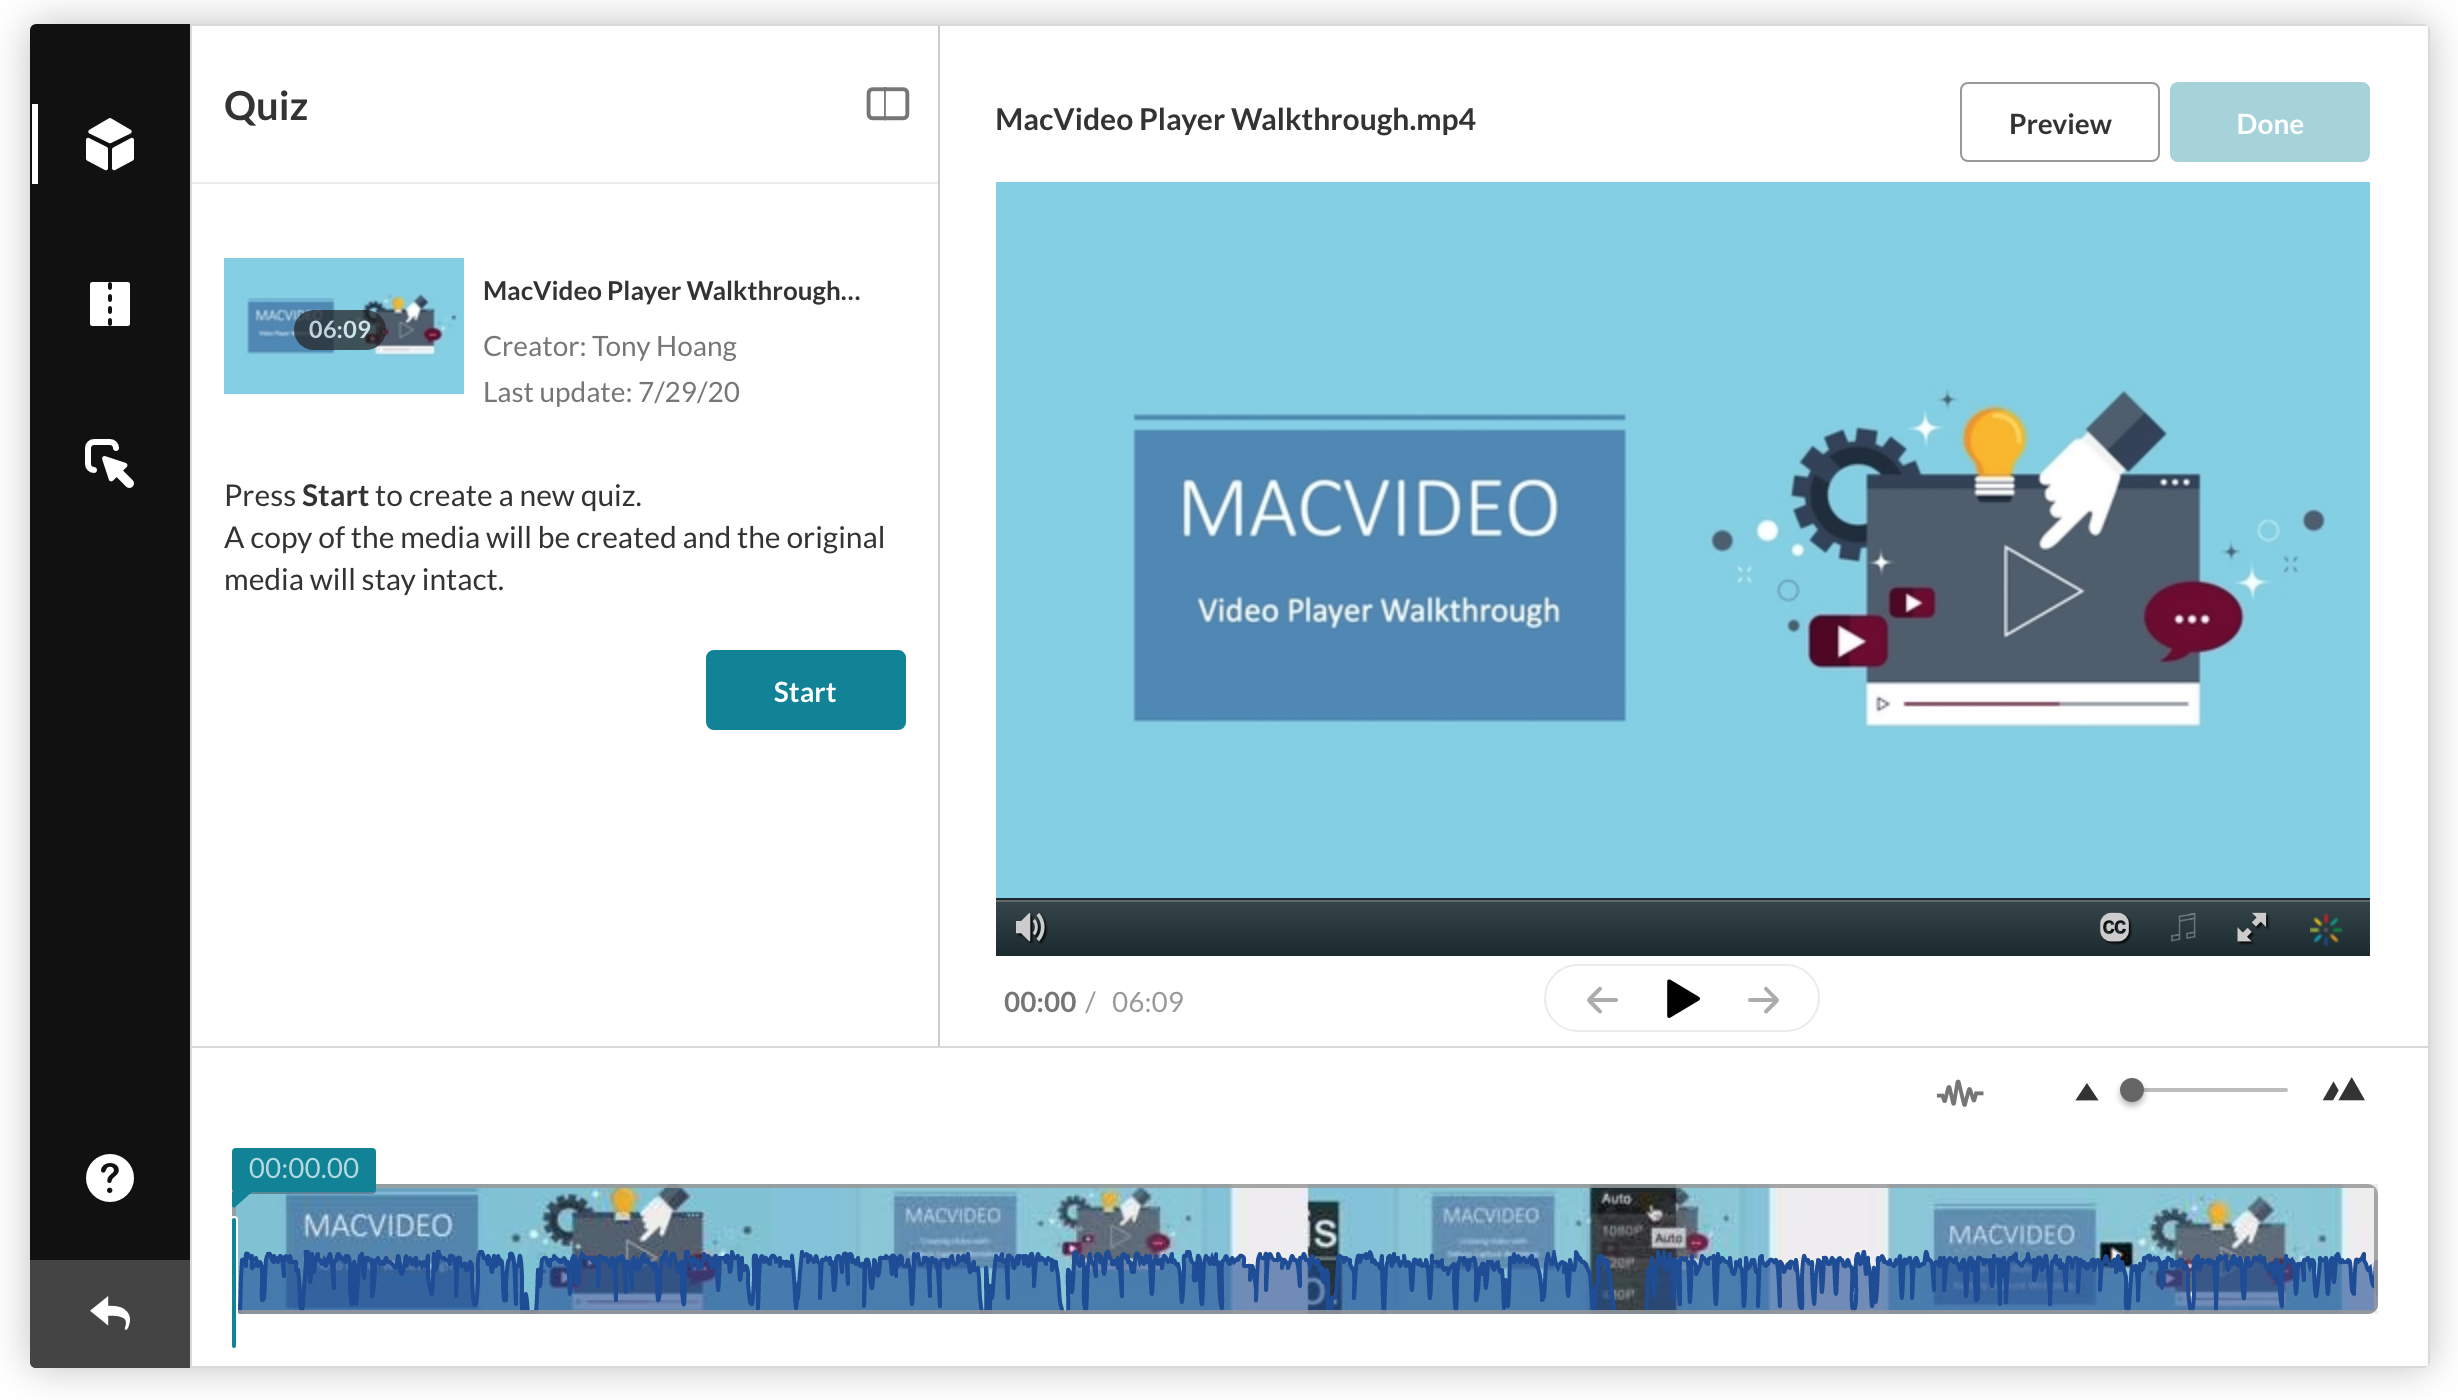
The Kaltura Editor is launched, and the Quiz tab is selected with your chosen media.
- Click Start to create the Quiz. A copy of the media is created, and the original media is retained.
- Use the Expand/Minimize icon to minimize/expand left pane to allow a cleaner view if you wish.Optional – Steps 6 through 8 include all options in the Quiz Editor with their default values. Open each section to modify the default values for the selected media entry.
- Click the Details tab. Default values are displayed. You may Revert to defaults at any time.
Details TabUpon Submission:
Resulting Display for the end-user
Quiz Name
Quiz Name
Welcome Message
The message that is displayed on the first screen of the quiz.If you disable the Welcome message display, viewers will not be able to see the Pre-test question list.
Allow Download of Questions List
Allow viewers to download the list of questions before starting the quiz.
Instructions
The following text will be displayed:
“All questions must be answered. The quiz will be submitted at the end.” - Click the Scoring tab to set or modify the scoring options. Default values are displayed. You may Revert to defaults at any time.
Scoring TabUpon Submission:
Resulting Display for the end-user
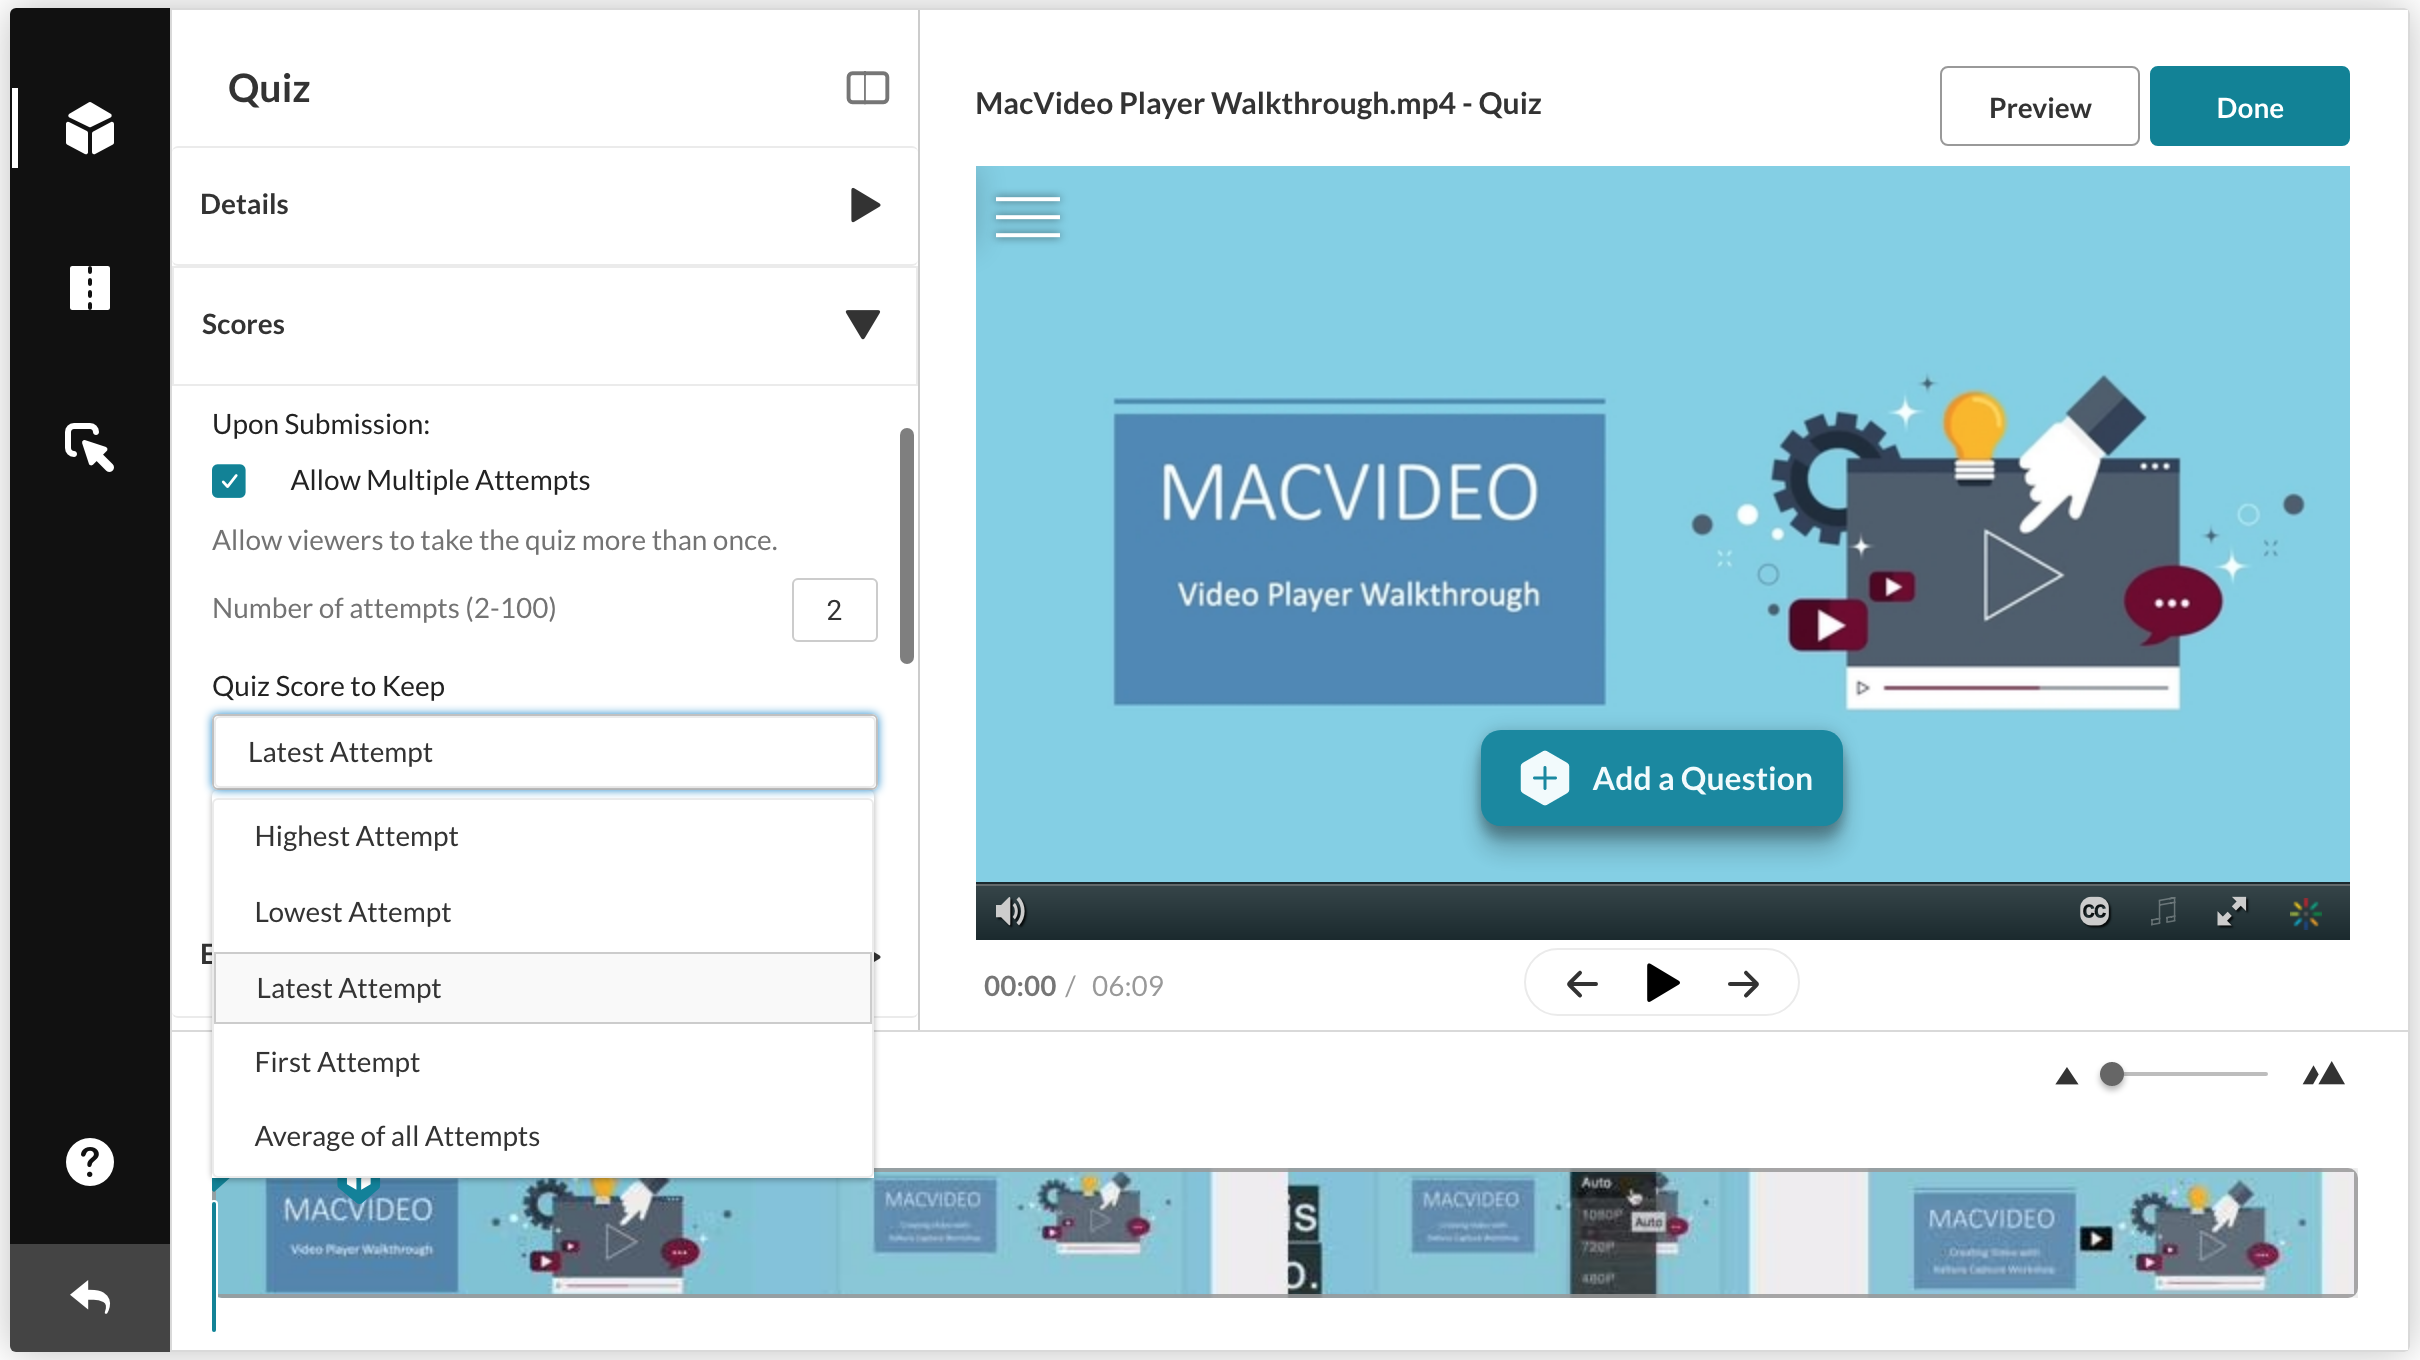
Allow Multiple Attempts
Allow viewers to take the quiz more than once. See Multiple Attempts and Scoring – Retaking a Quiz for more information. The minimum is 2 attempts per quiz.
Do Not Show Scores
A ‘Thank You’ message will display after submitting the quiz. No scores will be presented to the quiz-taker.
Show Scores
Your viewers will see the quiz score page after the quiz is submitted.
Include Answers
Your viewers will be able to see correct/incorrect answers, as well as the correct answer’s rationale if you chose to add it during the quiz creation (add link to where we talk about the “Why” button)
- Click the Experience tab to set or modify the experience options. Default values are displayed. You may Revert to defaults at any time.
Experience TabOption
Resulting Display for the end-user
Allow answers change
Your viewers will be able to change an answer before submitting the entire quiz, during review mode.
Allow Skip
Users will be presented with the “Skip for Now” button.
Do not alllow skip
Users must submit an answer before proceeding forward.
No seeking forward Users will not be able to use the seek bar to navigate the video past the point they viewed. Click Save after each time you modify any option.

Adding Questions and Answers to Your Quiz
This section describes how to add, edit and delete questions for the media quiz.
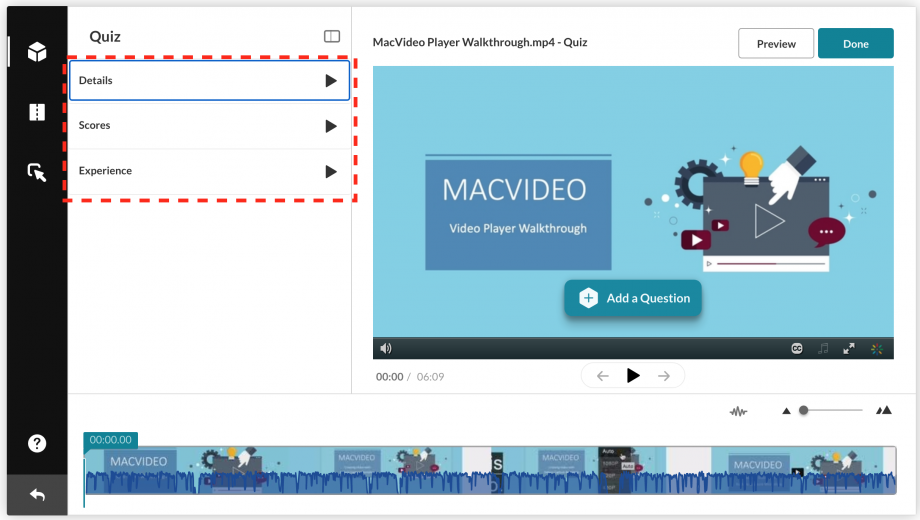
After you click the Start button or select to edit an existing quiz, the quiz question icon and text Add a Question is displayed on the player.
Click Add a Question to:
- Select the question type.
- Create Hints
- Create Rational (Why)
It is highly recommended that you place your final question close to the end of the video. After every question, the video continues from the point the video stopped before the question). Placing the final question near the end keeps the user engaged until the video topic is completed.
To create the quiz questions and answers
-
- Play the video or move the media’s real time marker to the desired point in the video’s timeline.
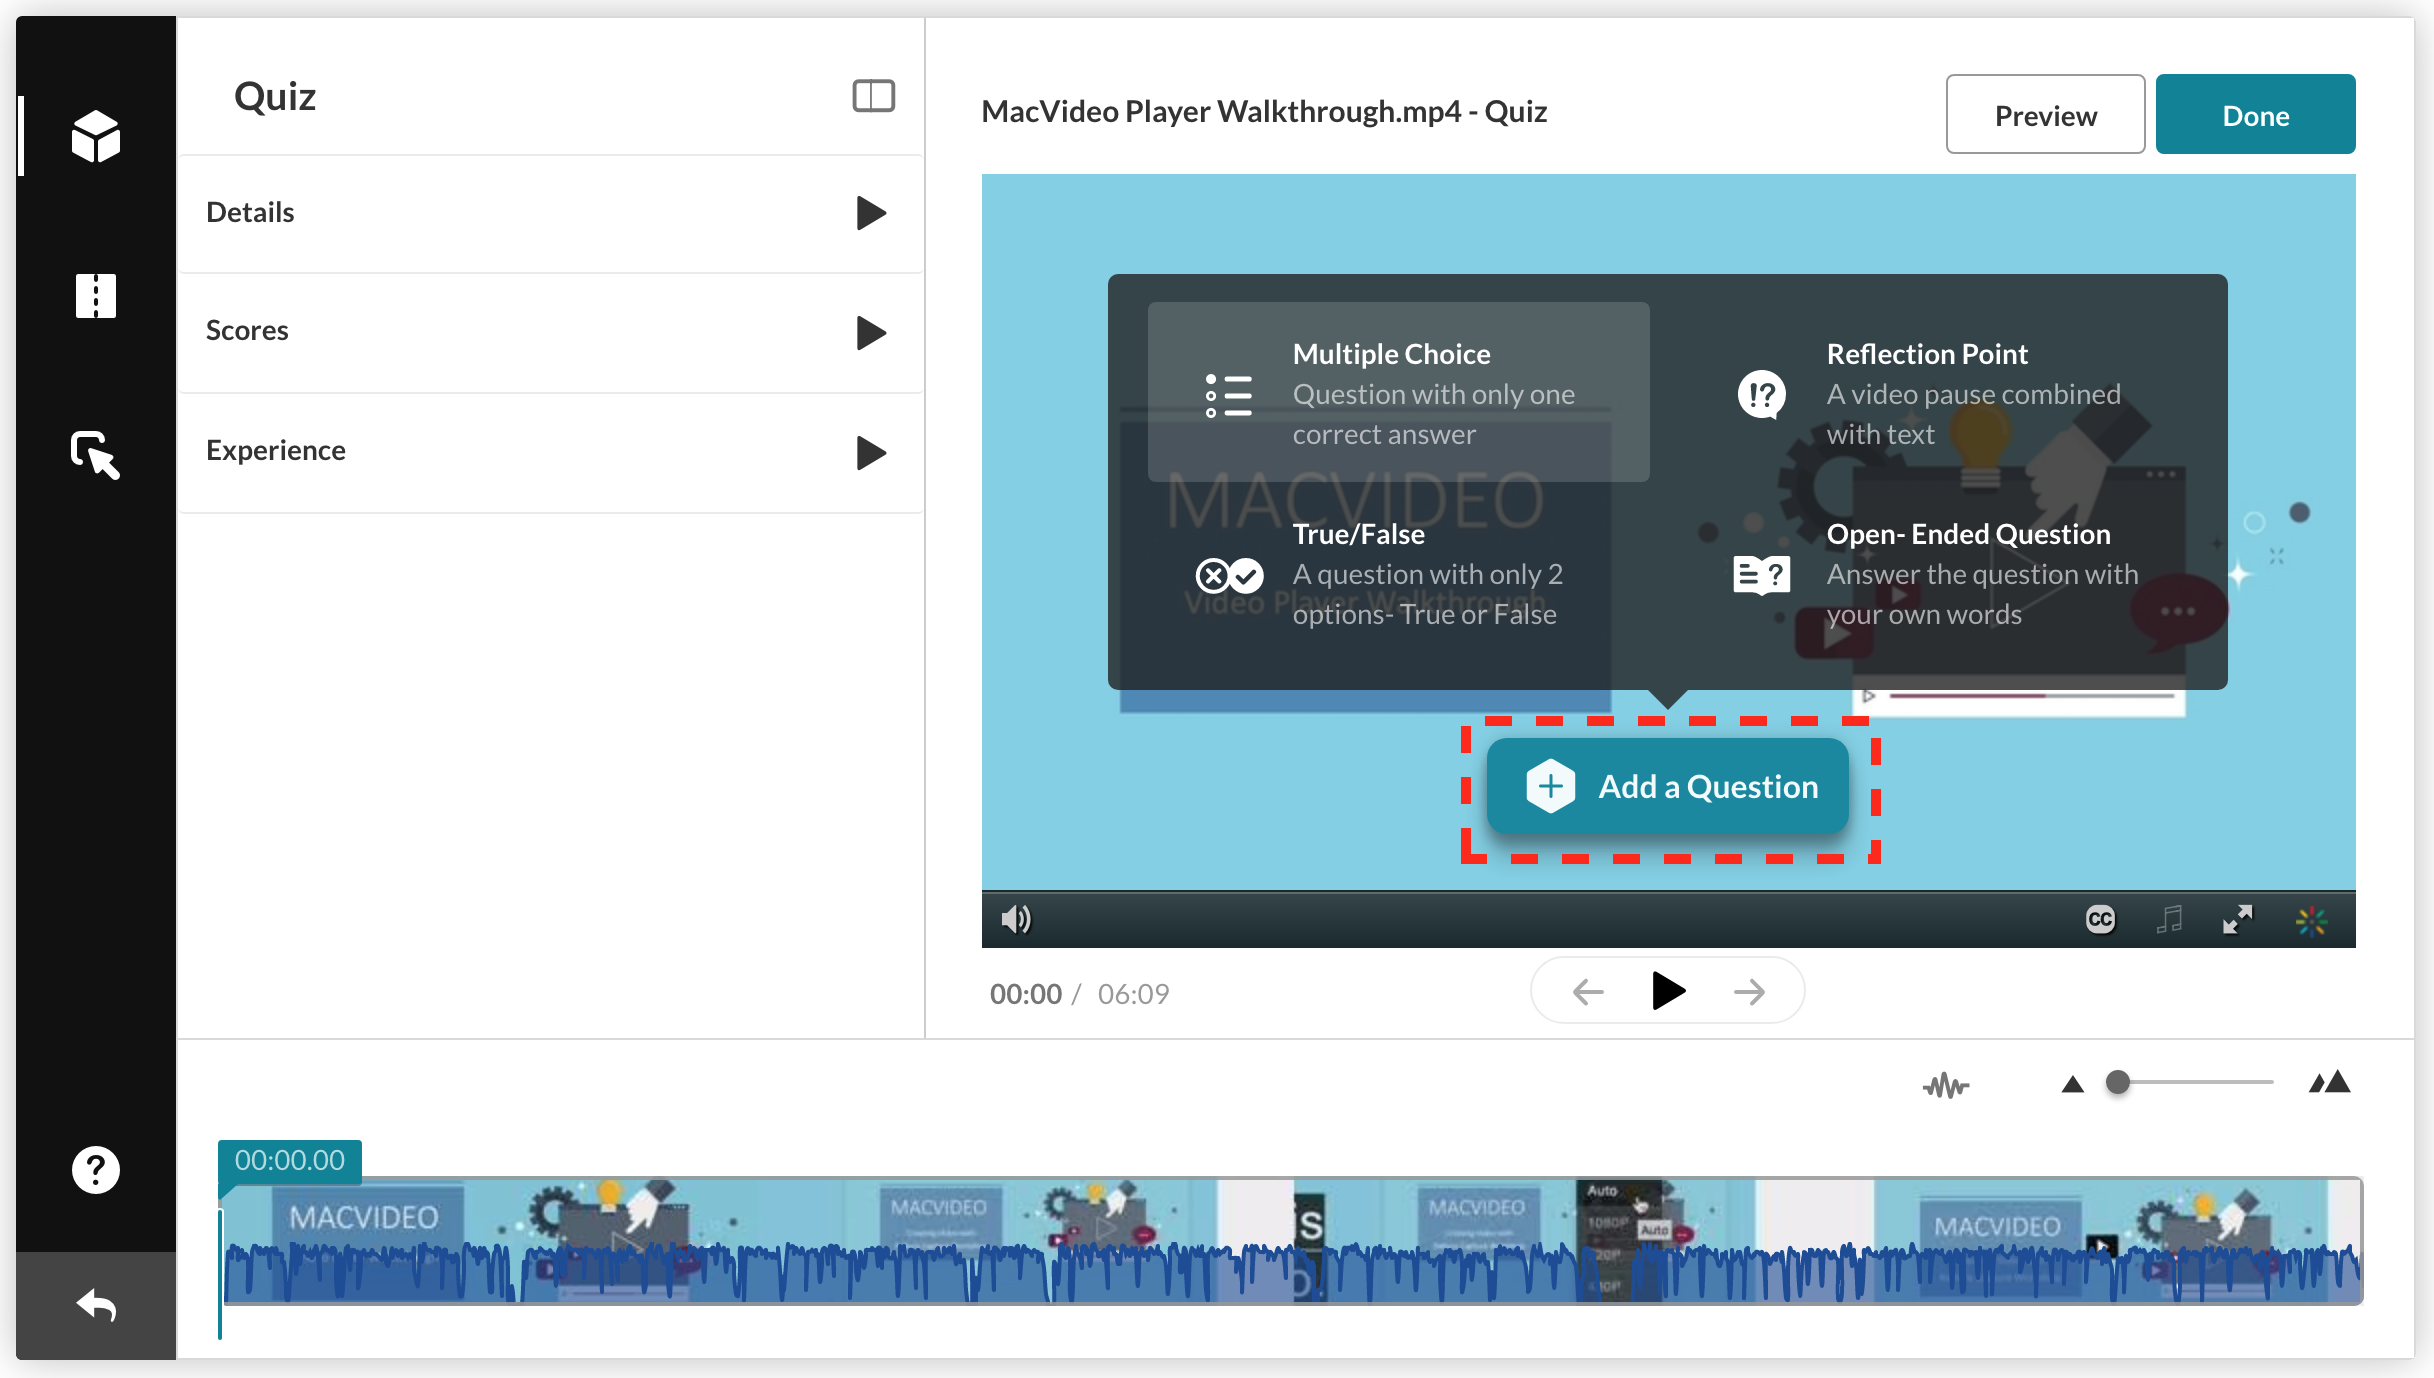
- Select a question type.
The following question types are available:- Multiple Choice – Question with only one correct answer.
- True/False
- Reflection Point
- Open Question – allows you to present the quiz taker with the option to add free text. After the quiz is submitted, the quiz owner can look at the written response and write notes. See Quiz Reporting for more information. The Quiz Module must be configured by your administrator to have this feature enabled. NOTE: An Open Question is not gradable and is considered in the same way as a Reflection Point is considered. Both question types have no impact on the grade.
- Play the video or move the media’s real time marker to the desired point in the video’s timeline.

- Enter the question text.
- (Optional) For questions only, you can add a link. To add a link in Windows: Enter Ctrl K, in MAC Command K. Change the link title to the text to display on the question and change the URL to the desired URL site.
- In the Add the CORRECT Answer Here field – enter the correct answer.
- In the Add Additional Answer Here field– enter other possible answers to choose from. Two answers are mandatory. Click the Plus sign to add more answers. You may add up to four answers (maximum).
- Use the Shuffle icon to shuffle the order of the answers, or hover over the three dots in the answers to manually drag the answers to re-order them. Shuffling your answers will ensure that the correct answer is not presented at the same order every time. The correct answer displays a check mark at the right end of it.
- To delete an answer, click on the x near the answer. The correct answer cannot be deleted, only modified.
- (Optional) Before you save the question, you may add a hint to the correct answer. When you finalize the quiz, you may add the Why rational.
- (Optional) Click the Lamp Icon. The Hint and Why icons are displayed. A hint contains additional information the user can choose to see while answering the question. It does not affect the score or any other behaviour or parameter of the VQ. The “Why” icon is the rationale of the correct answer, which can explain your users why this is the correct answer.
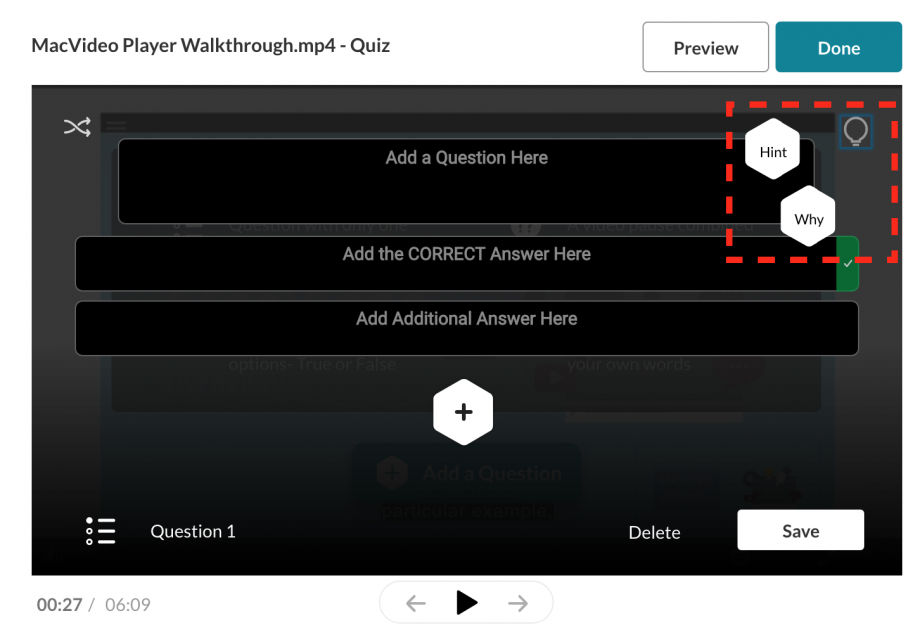
- Click Hint and enter a Hint. Click Apply or Remove. If the question has a hint a small ‘V’ icon is displayed in the Hint icon.
- Click Why and enter the rational. Click Apply or Remove. The Why comes up only at the end of the quiz and only when the option to Include Answers is checked in the Scoring tab.
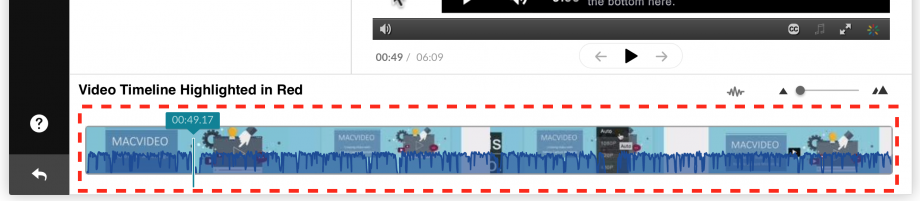
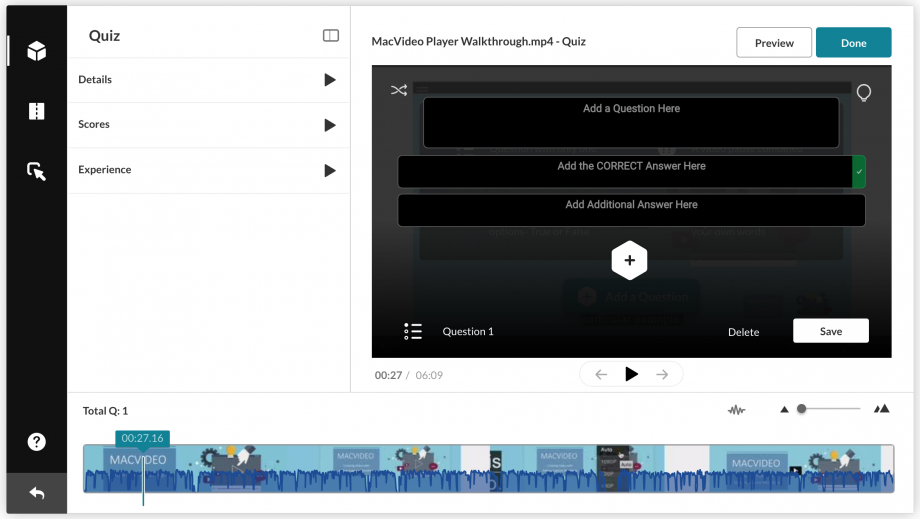
- Click Save to save the question or Delete to delete the question.The question is saved with the question indicator on the timeline. An animation is displayed pointing to the cue point in the time line where the question will be displayed.


- Move the media’s real time marker to the desired point in the video’s timeline to add additional questions and repeat the steps in this section. Try not to place questions too close together. If they are very close together, zoom into the timeline to get more precise placement of the quiz questions. Avoid having too many consecutive questions in a row.
- Click Done when done. The Editor screen is displayed with the quiz questions displayed as cue points on the timeline. In this example, the quiz has 3 questions. The total number of questions is also indicated on top of the timeline.
To Preview the quiz
- Click on the Eye icon below the player. The following example displays a quiz that has 3 attempts enabled to the quiz taker. See Multiple Attempts for more information about retaking quizzes.
- Click Continue to see the quiz you created. Click Escape to exit Preview mode.
- Play the video and be certain that the questions and answers are correct and in their proper places in the media. Click on the question cue point to jump to the question.
To edit a quiz
- While still in the quiz, click Edit Quiz.
- Click on the question cue point on the timeline.
- Enter your changes on the quiz editor screen, and Save.
- Click on the x near the answer to delete an answer. Click on the 3 dots to shuffle the order of the answers. Click Delete to delete the entire question.
- To Preview the quiz, click the Eye icon below the player.
- When you are done creating or editing the quiz, click Done.
To view or continue editing your quiz
- Use the Edit tab to continue editing your quiz, or to trim or clip the media. You will see the question icons spread on the Timeline as a reference.
- Click “Go To Media” to view the quiz in your media list.
Viewing the Pre-Test
You can view all the questions and their possible answers before you take the actual quiz. The option Allow Download of Questions List must be checked in the Details tab.
Viewing the Pre-test is very useful to students or users that want to prepare the subject matter of the quiz ahead of time.
To view the questions before taking the quiz
- Login to your KMS or KAF instance.
- Go to My Media.
- Click on the quiz entry.
- Play the video.
- Click on Pre-test Available to open the questions and answers list in PDF format.The questionnaire and possible answers are downloaded to your PC in PDF.
Multiple Attempts and Scoring – Retaking a Quiz
A quiz creator may select how many attempts a user has to take a selected quiz as well as which score to use (highest, lowest, first, last, average).
To allow users to retake the quiz
- Check Allow Multiple Attempts in the Scoring tab.
- Enter the number of attempts that will be allowed for users to retake the quiz.
- Select the quiz score to keep. The quiz creator may determine how the score should be calculated from of the user’s attempts. The options are: highest attempt, lowest attempt, latest attempt, first attempt or average of all attempts.
If the Welcome screen is enabled for the quiz, the number of attempts left is displayed. The number changes each time an attempt is made to retake the quiz.
After a user submits the quiz, the submitted page will show the current attempts score, and the final score. The quiz taker will be able to see the scoring selection that the quiz creator is using.
Users will not be able to see previous answers they submitted after they select Take the Quiz again.
Taking the Quiz
If you’re planning on utlizing video quizzes, it’s important you provide instructions on how to properly take video quizzes. You can provide the following link Kaltura Video Quizzes – How to Take a Quiz.