The Web Recorder enables recording content directly from a browser without the need to install or use Kaltura Capture. The Web Recorder can use your webcam, screen and microphone or any other audio input to record video. The browser must support webRTC. For information about the supported browsers see Kaltura Express Capture Supported Browsers / Devices.
The time limit for recording with the web recorder is currently set to 4 hours.
It’s important to note that if you use the web recorder, you are relying on your browser and internet connection. You will have the choice to download the video file itself once finished recording.
To use the Web Recorder follow the steps below:
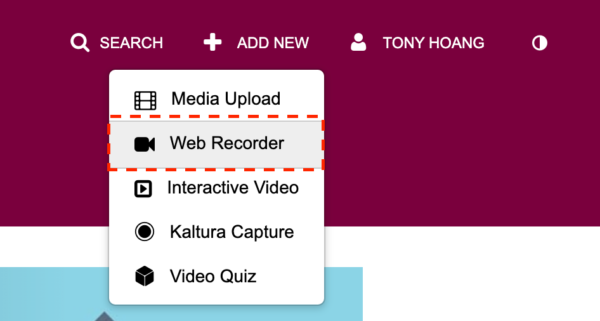
- Click on Add New from the home page and then select Web Recorder.
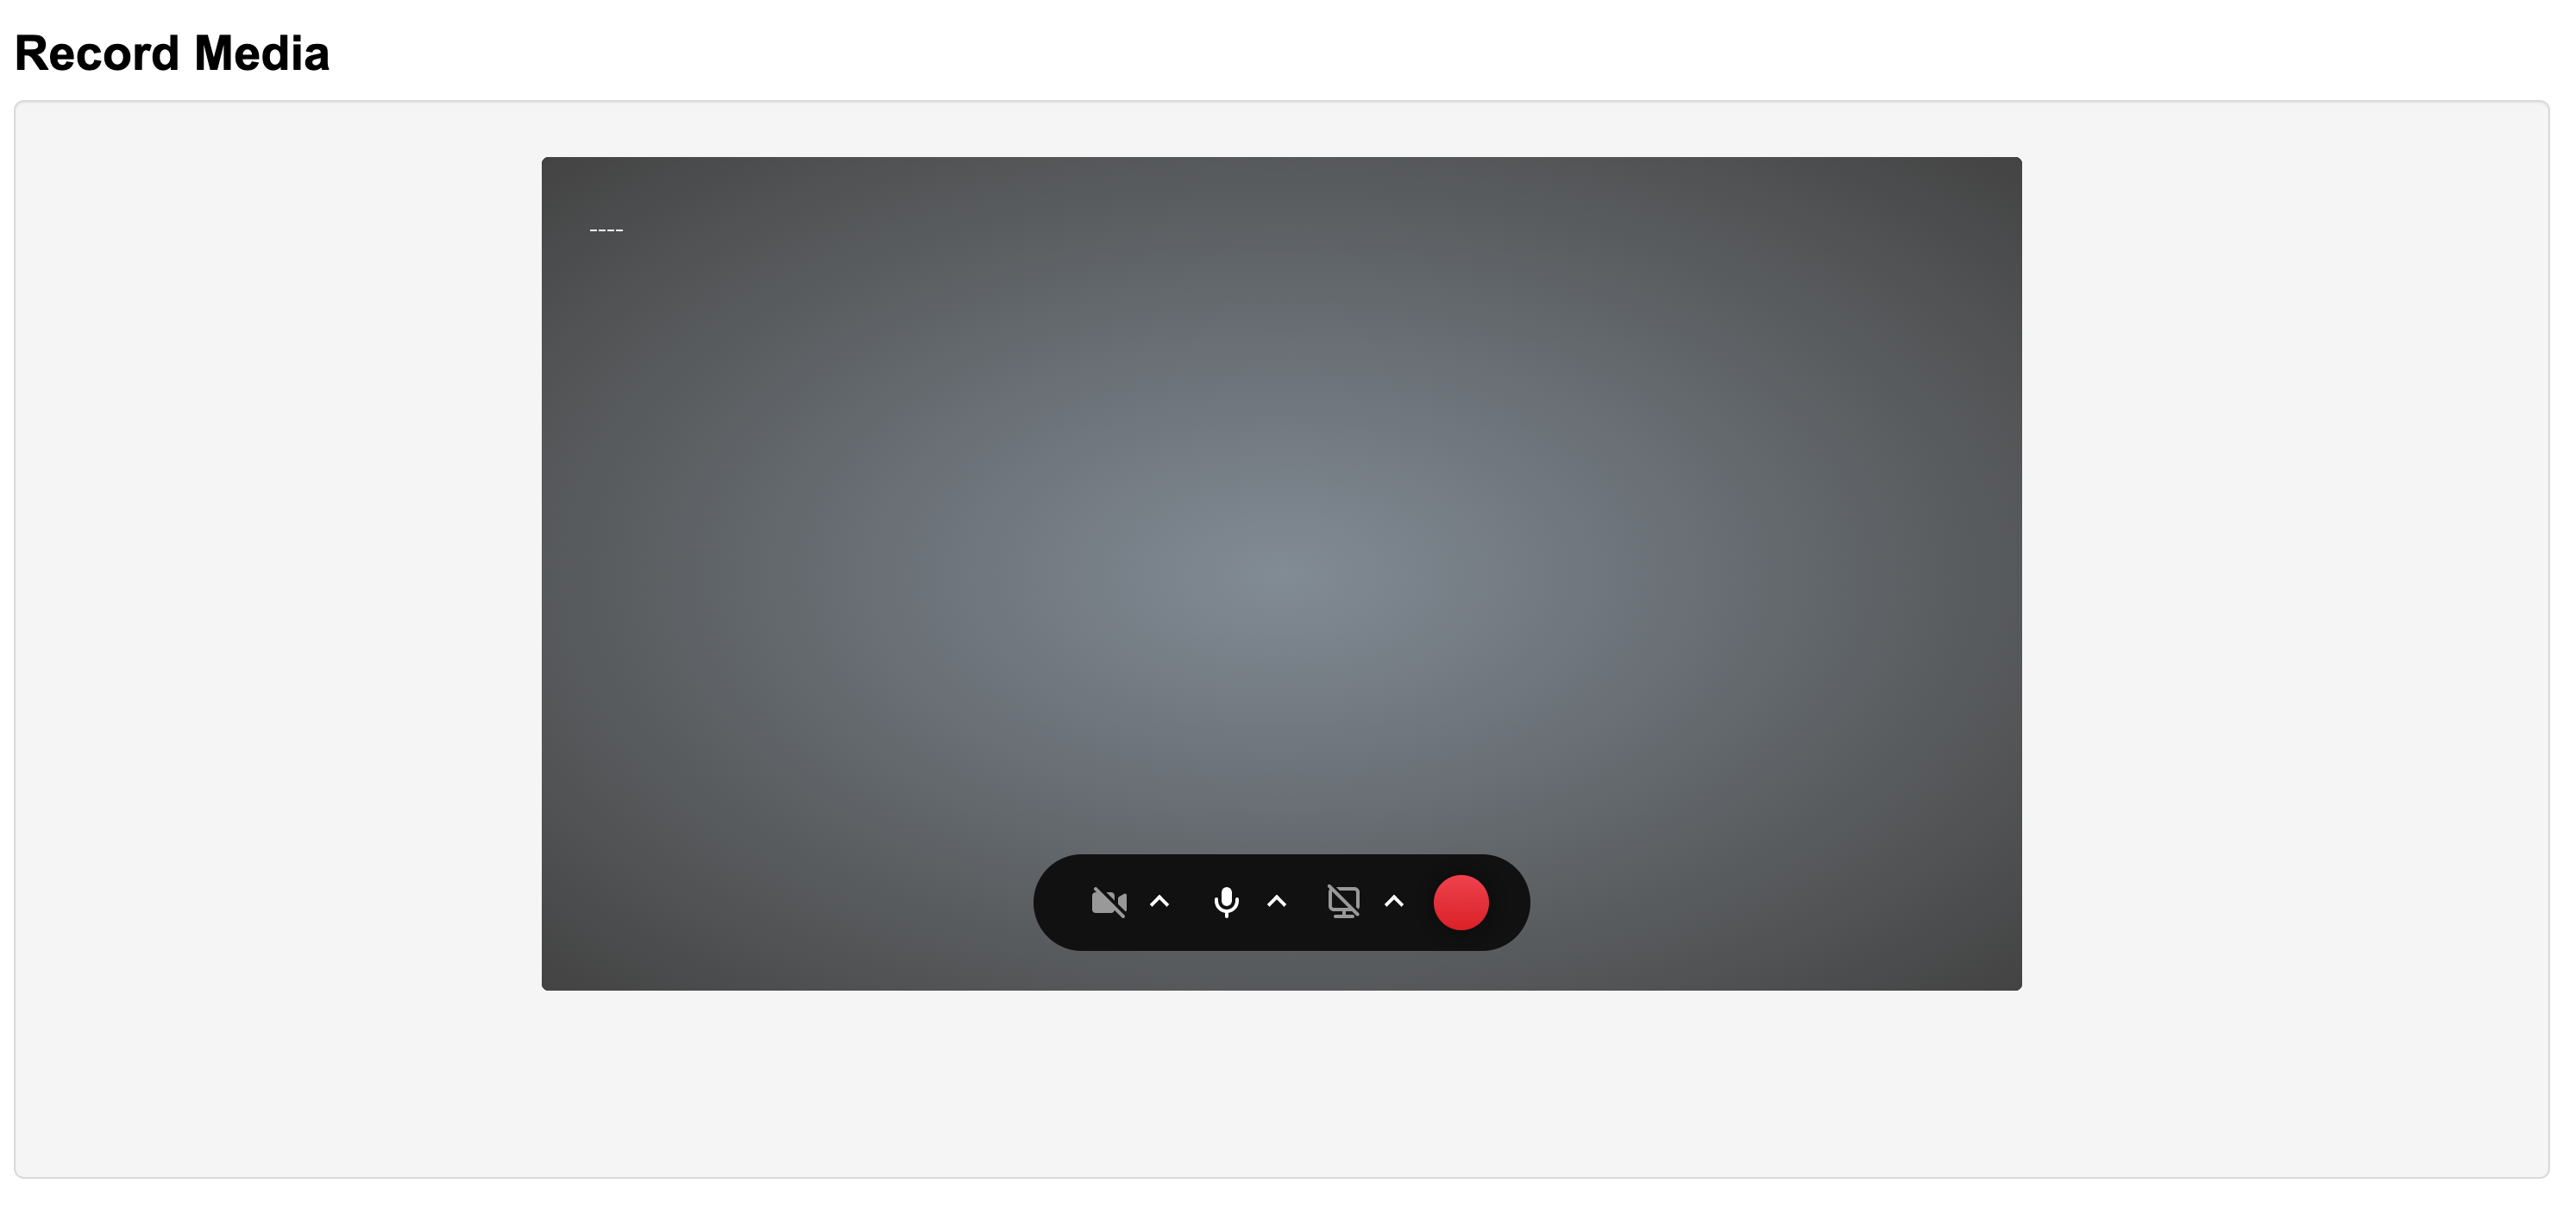
- You will now see the Record Media Page.
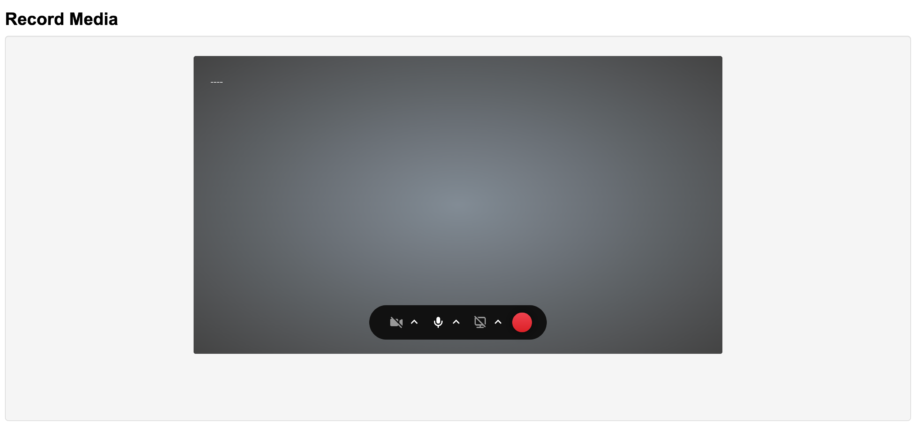 From here you have the options to turn on the different settings. You can enable your webcam, audio input and or screen sharing.
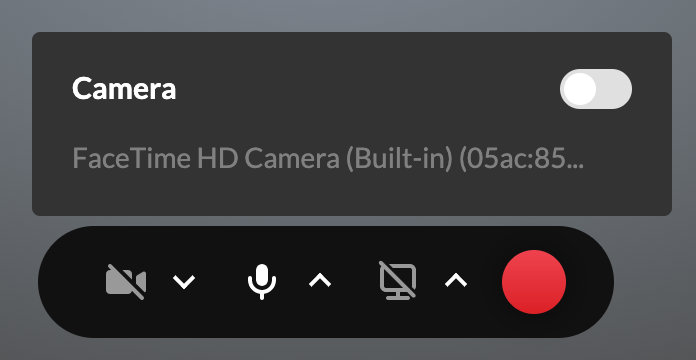
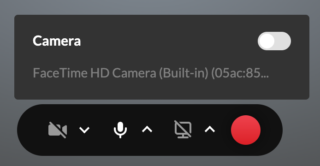
- a) Camera Settings: Here you can select which camera source to use.
 b) Audio Input: Select which audio source to use.
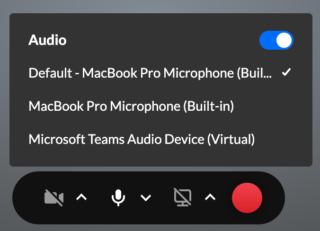 c) Screenshare: Here you can choose to share your screen. A web window will pop up showing you options if you want to share the whole screen, a specific window or a specific browser tab.
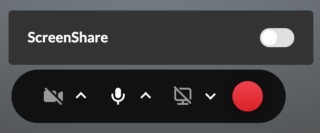
- a) Camera Settings: Here you can select which camera source to use.
- Once your set up is complete, to record hit the red button. You will get a 3 second count down before it begins recording. Once done recording hit the red stop button to stop recording.
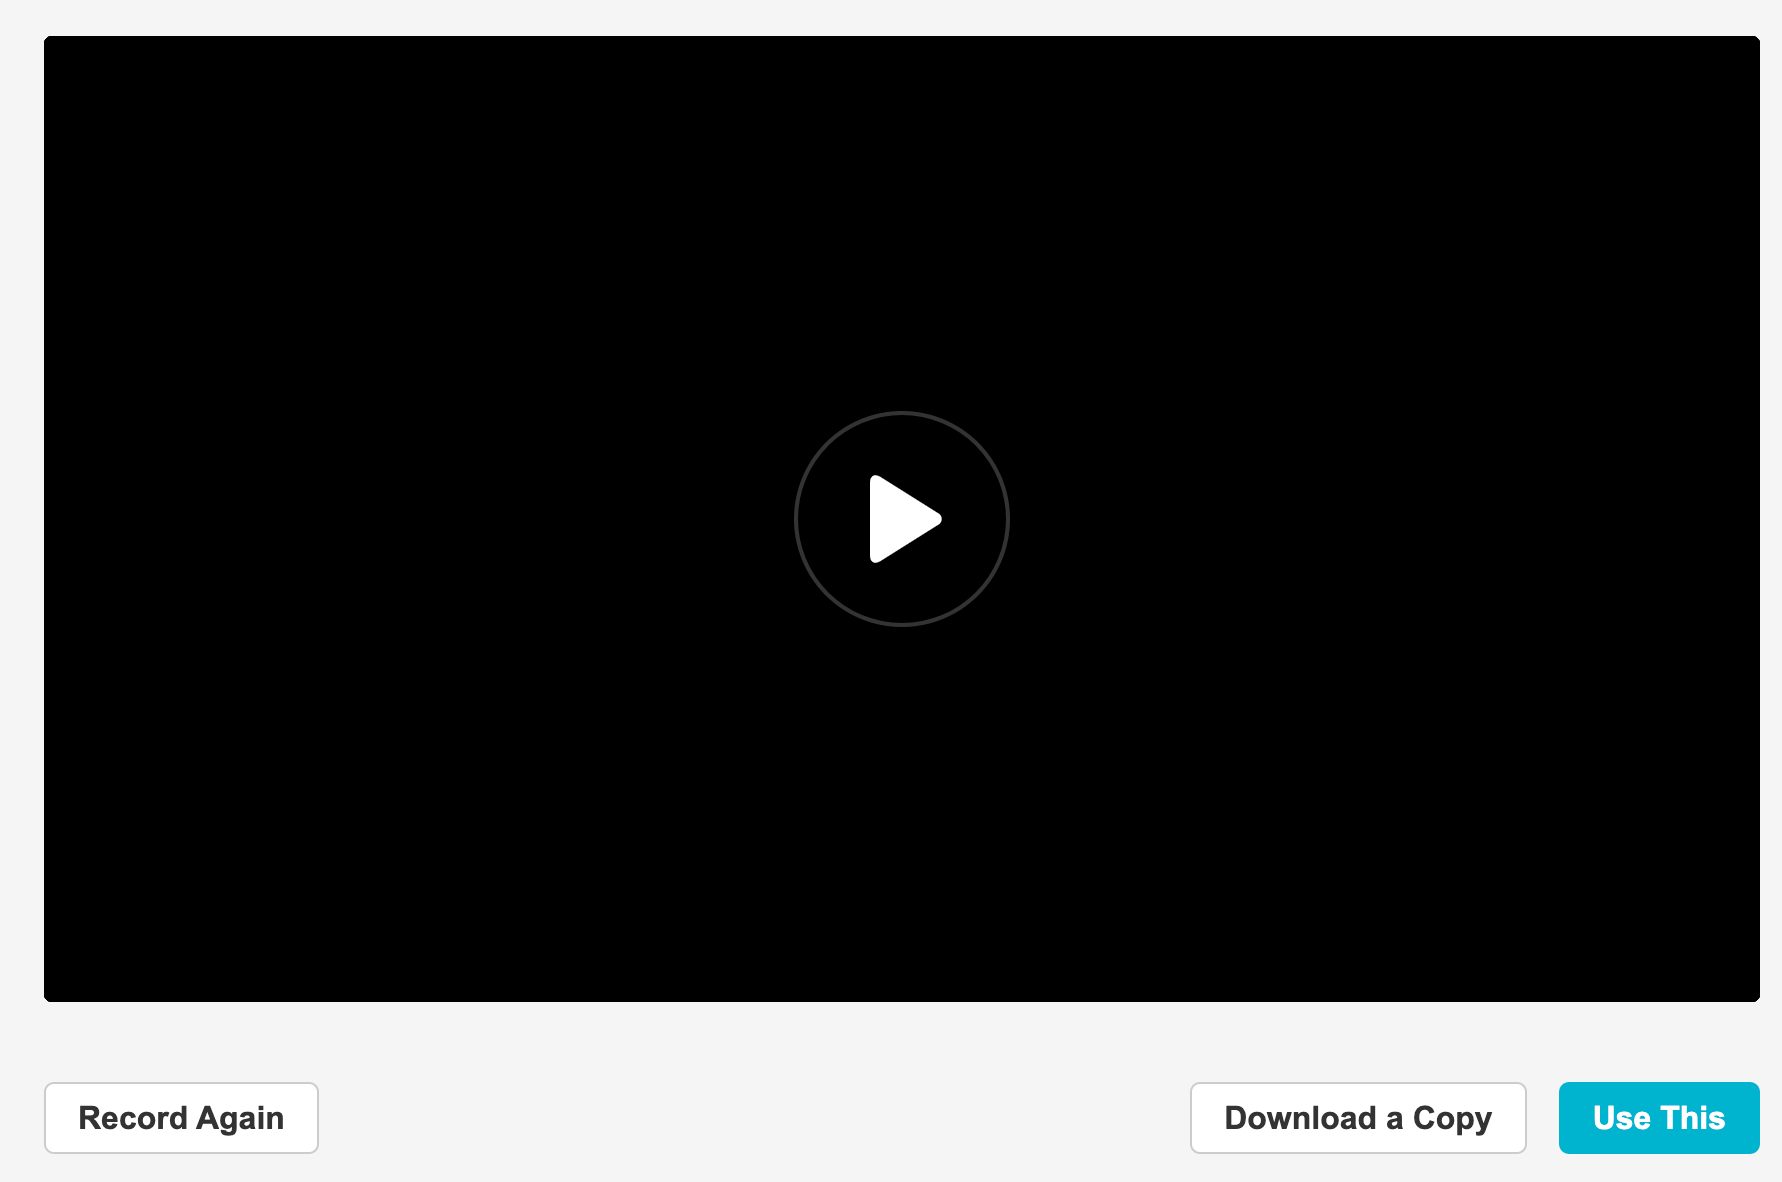
- Once you’re done recording, you’ll be shown a preview window of what you just recorded.

You have the option to record again to do another take, download a file of the video itself, or upload directly to your account by clicking the “Use This” button. - You will then be taken to the normal upload page showcasing the upload progress bar, and all the information fields to fill out that are required.