
To use Kaltura Capture, you’ll need to first log into your account at www.macvideo.ca
*Important Note:
By default videos recorded with Kaltura Capture are set to Private. If you’d like your videos to be view able within Avenue to Learn, you must log into www.macvideo.ca and publish your video as Unlisted. To see how to publish your media go to the tutorial here.
Once you’ve logged in, navigate to the top right and click the “Create” button.

A submenu will open and then click Capture.
You will need to download and install the Kaltura Capture software before you can begin recording. The installer should appear automatically, but if it doesn’t you will have to manually download the installer by clicking the “Download for…” links near the bottom. Ensure to choose which operating system you’re currently using whether you’re on a Windows or Apple computer. Make sure that if you’re choosing the location where Kaltura Capture is installed, to install it on a folder on your local hard drive. Not a folder that is connected to cloud storage such as Google Drive or Dropbox.

Once you’ve installed Kaltura Capture it’ll start automatically once you select it from the Create menu.
When using Kaltura Capture the videos are saved locally on your computer. The files will be saved where you’ve selected to install the Kaltura Capture software during installation. To see where you can find these files go here.
From the Kaltura Capture interface, you can select what to record whether it be your webcam, screen or both and which audio input device to use.
Once Kaltura Capture has started you’ll see this interface appear.
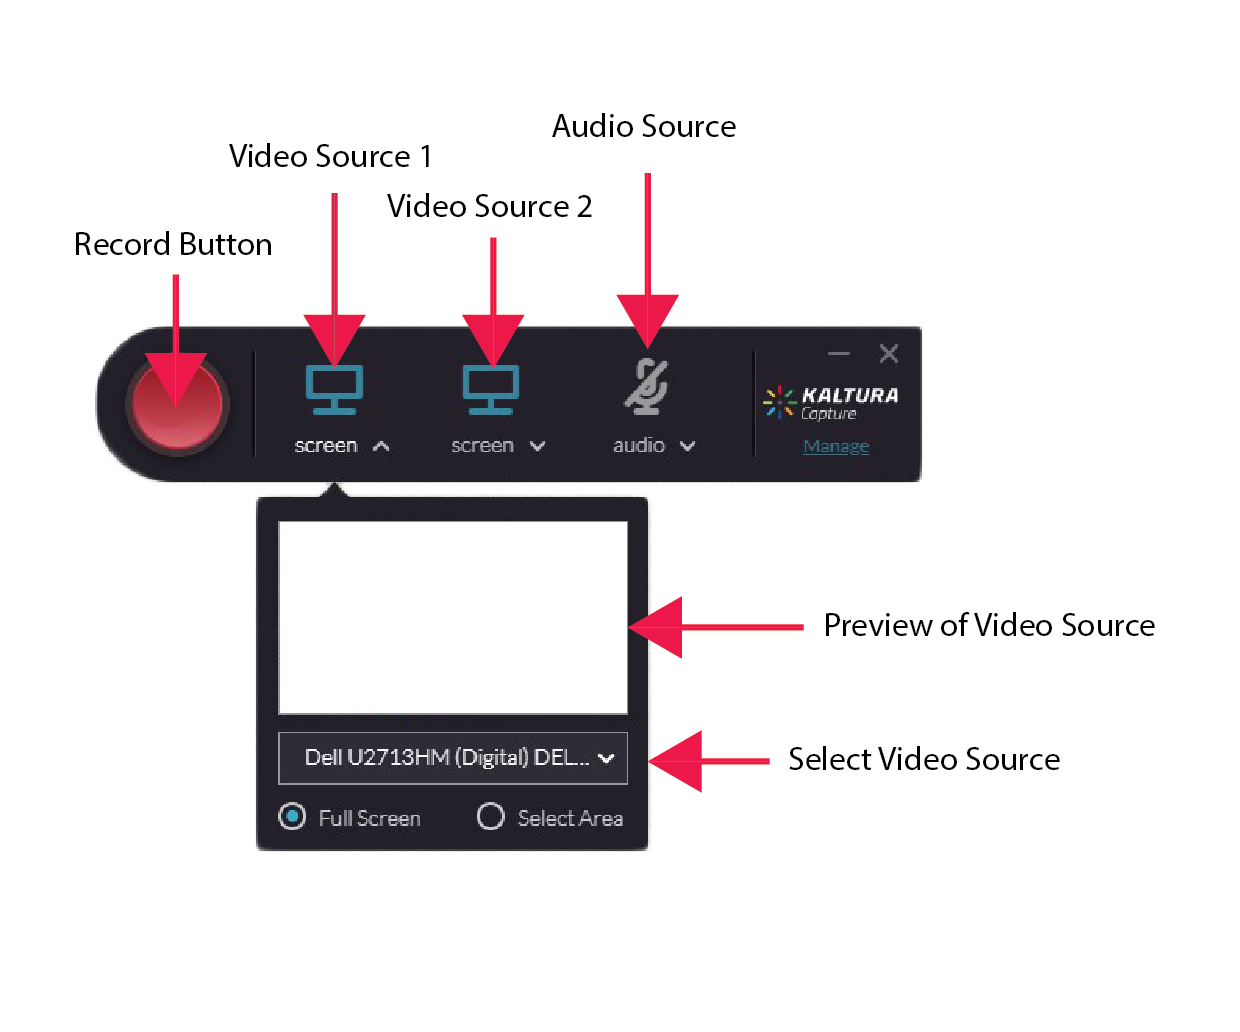
Record Button: Hit this button to begin recording
Video Source 1 & 2: These are the video sources that will be recorded. You’ll have an option to decide recording your screen, webcam or any other video source you have connected to your computer.
Audio Source: You can select which microphone you’ll use to record audio. This could be the internal microphone on your laptop for example, or an external microphone you have connected to your computer. (Make sure to double check your audio settings if you can’t find the correct audio source)
The source is active if the colour of the icon is blue. If it is grey then it is not activated.
Once you’ve hit record you’ll see the interface below.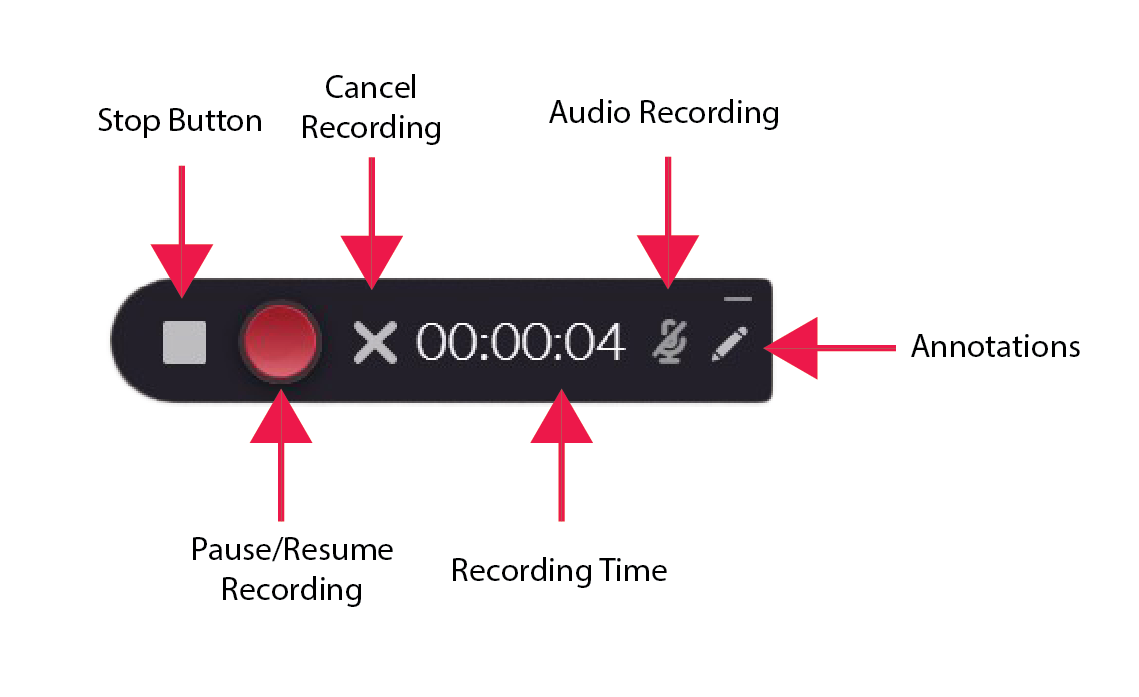
Stop Button: Click this button to end and complete the recording.
Pause/Resume Recording: You can pause and resume your recording whenever you like.
Cancel Recording: If you’d like to discard the recording. Nothing will be uploaded into your MacVideo account. You’ll be prompted to confirm discarding the video.
Annotations: You have the option to add annotations to your live video recording. You can draw with a pencil tool, add arrows, add type and add a white board. You also have color and scaling options for each.
Once you’re done recording and hit stop you’ll see the interface below.
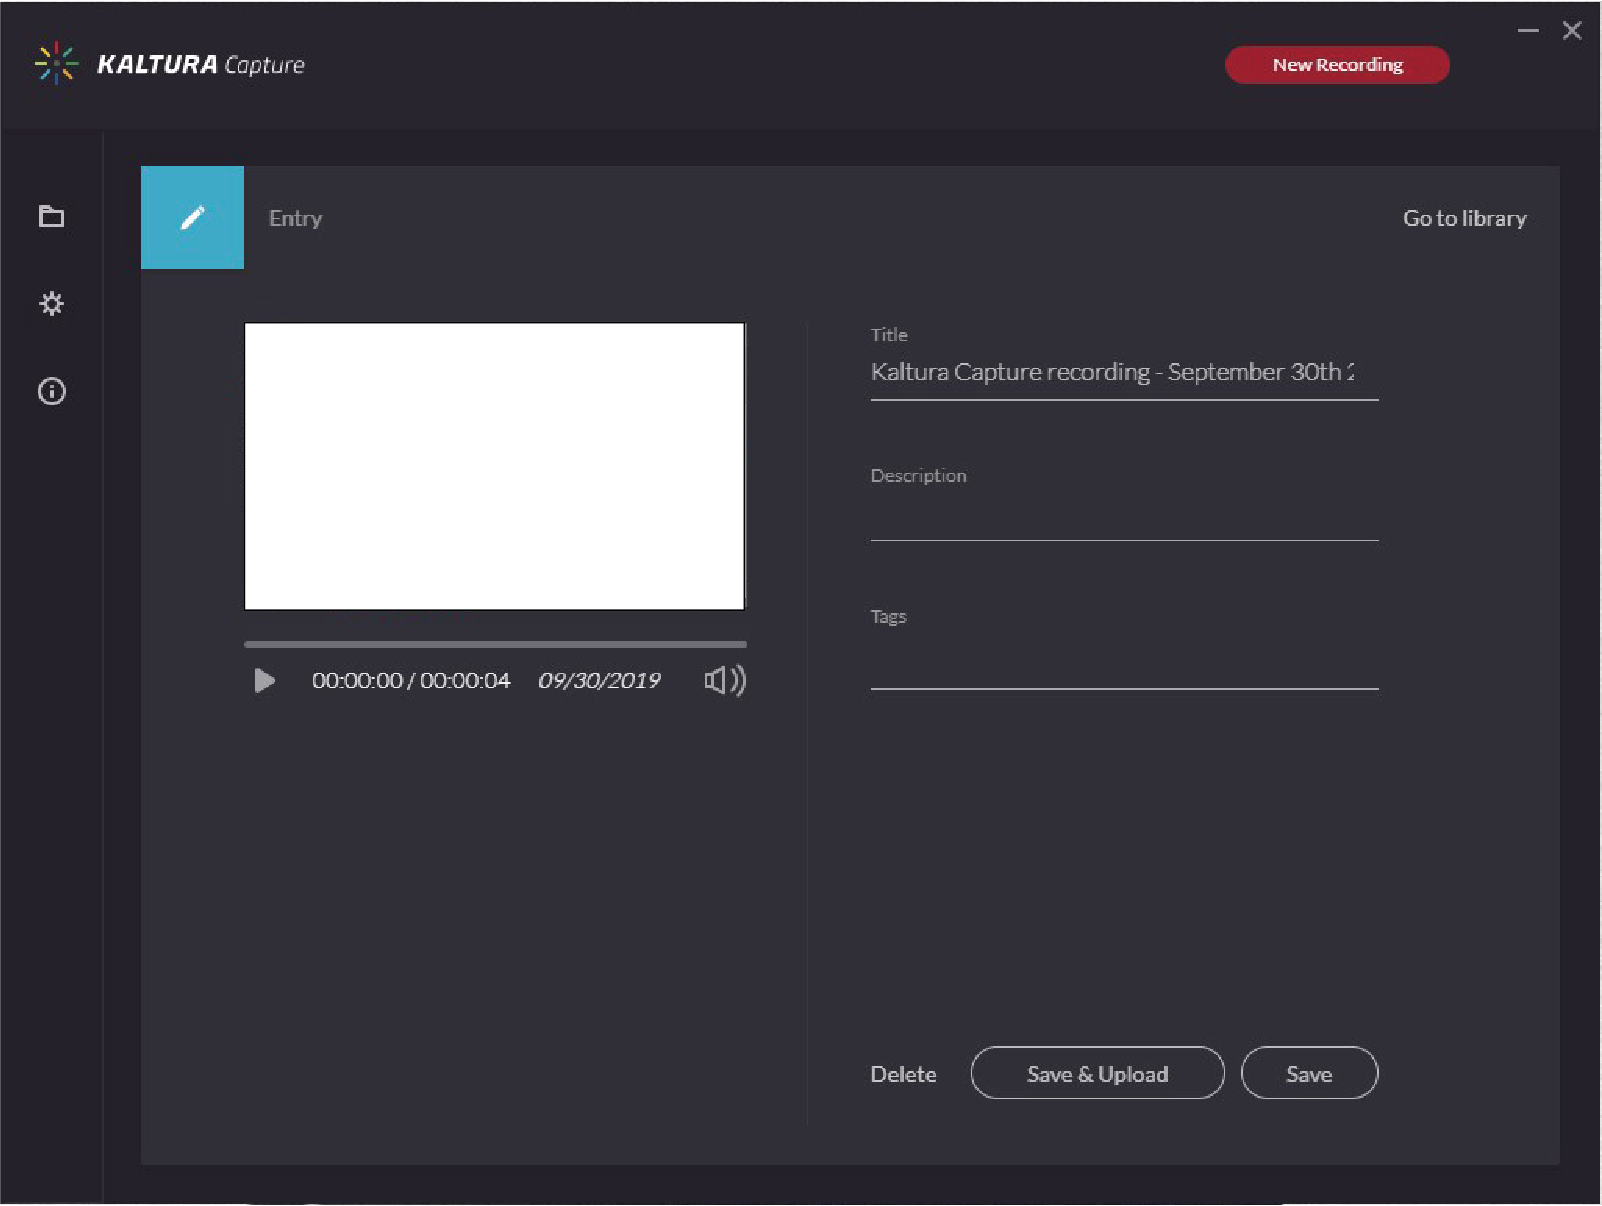
Here you can choose what to name your video, give it a description and tag it. You have the option to just save the video in your library (which is stored locally) or save and upload directly to your MacVideo Account. From here you can also view your video library, change your recording video settings and log out or into another MacVideo account.
If you’d like to see a video overview of Kaltura Capture watch the video below.
If you’d like a more in-depth guide on how to use Kaltura Capture you can go to Kaltura’s user guide.