
How to Create a Channel
After logging in there are multiple ways in which you can create a channel. You can create a channel by going to:
- Under your username and clicking on “My Channels” and then clicking the “Create a Channel” button


2. Clicking on “Channels” in the top navigation menu and then clicking “Create a Channel” button.
Once you’ve clicked Create a Channel you will see the “Create a New Channel Page”:
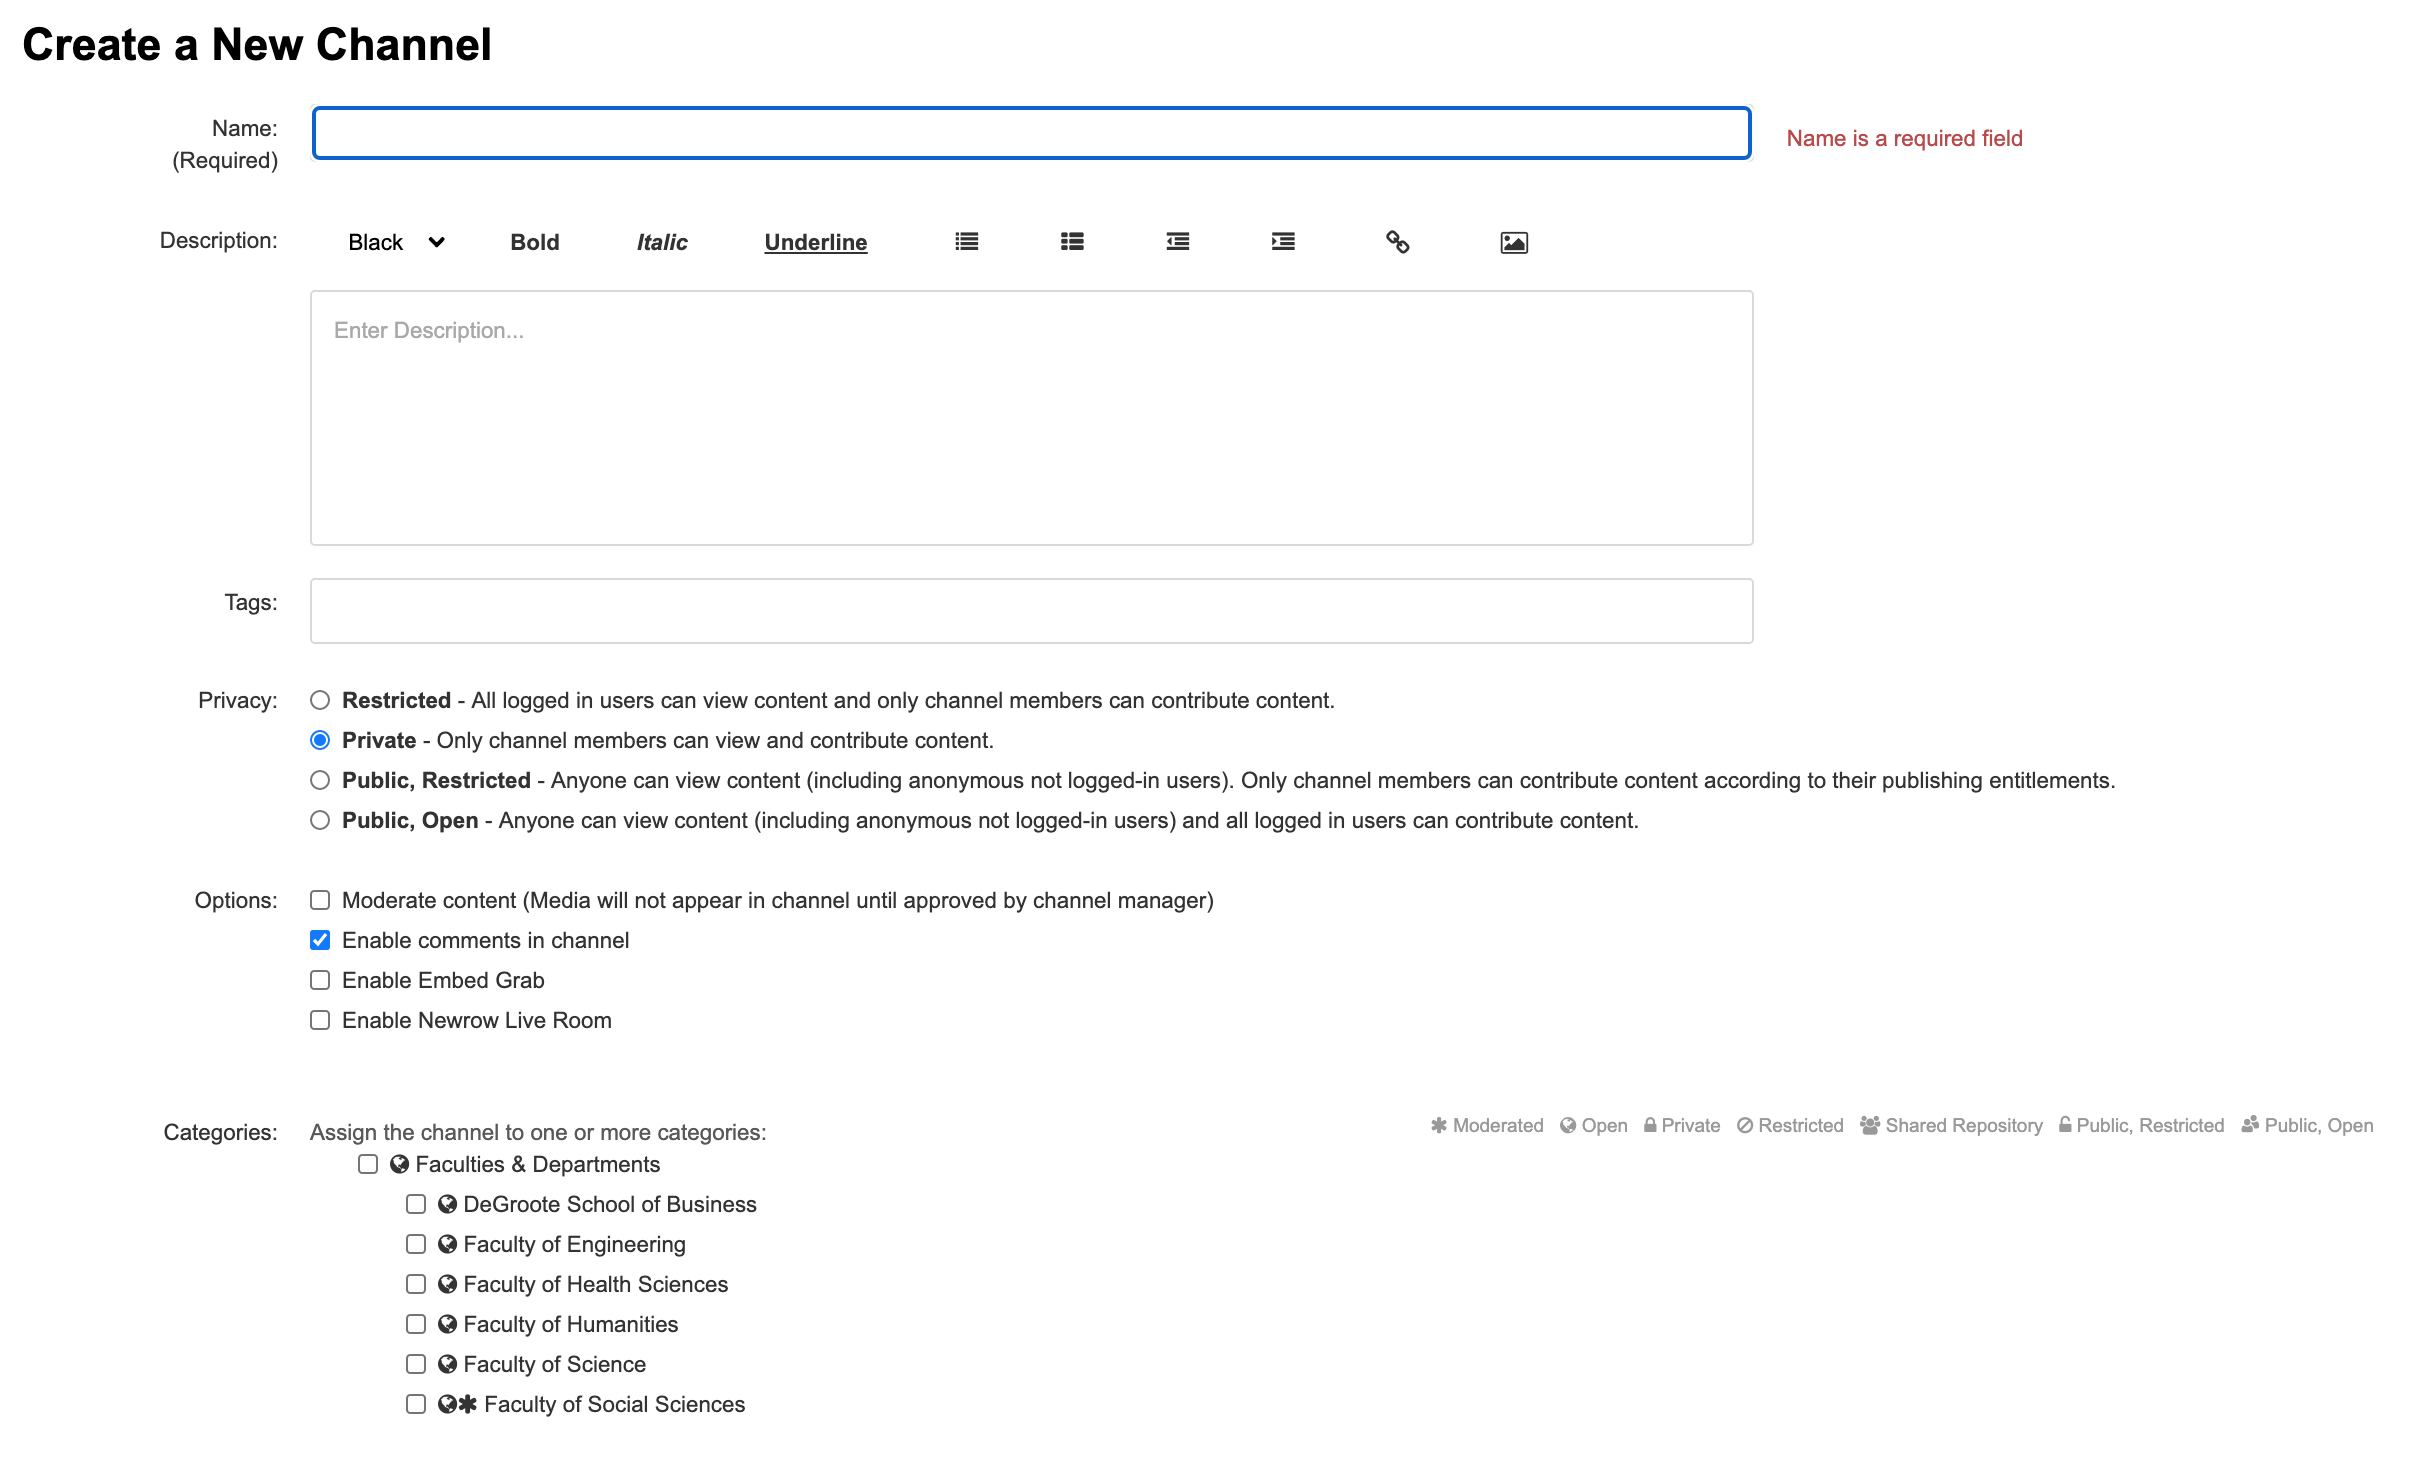
Here is where you enter important information and select the settings for your new channel.
- Name – Enter the channel name to display on the Channels page.
- Description – Enter a summary of the channel content to display on the My Channels page.
- Tags – Enter descriptive tags to use in searches.
- Privacy – Select the privacy settings for the channel.
Note: These settings will override the individual viewing permissions of the videos you publish in the channel.
Restricted – All logged in users can view content and only channel members can contribute content.
Private – Only channel members can view and contribute content.
Public, Restricted – Anyone can view content (including anonymous not logged-in users). Only channel members can contribute content according to their publishing entitlements.
Public, Open – Anyone can view content (including anonymous not logged-in users) and all logged in users can contribute content. - Options – Select the options settings for the channel.
Moderate content – Media will not appear in channel until approved by channel manager.
Enable comments in channels – Users will be able to comment on videos in the channel.
Enable Embed Grab – Users will be able to get an embed code to share from the video in the channel.
Categories – Depending on your account permissions you may be able to categorize your channel into these categories.
Once you’re happy with your settings make sure to click Save.
Important Notes:
- You do not need to create a channel if you plan to share your videos within Avenue to Learn.
- Channel members cannot embed videos into Avenue to Learn using the integration. If you want contributors to be able to embed within Avenue, they must be a co-editor and co-publisher to each video.
How to Edit Your Channel
Once you’ve created a channel you will then be able to edit it. This includes adding members, changing the thumbnail and viewing the analytics for the channel.
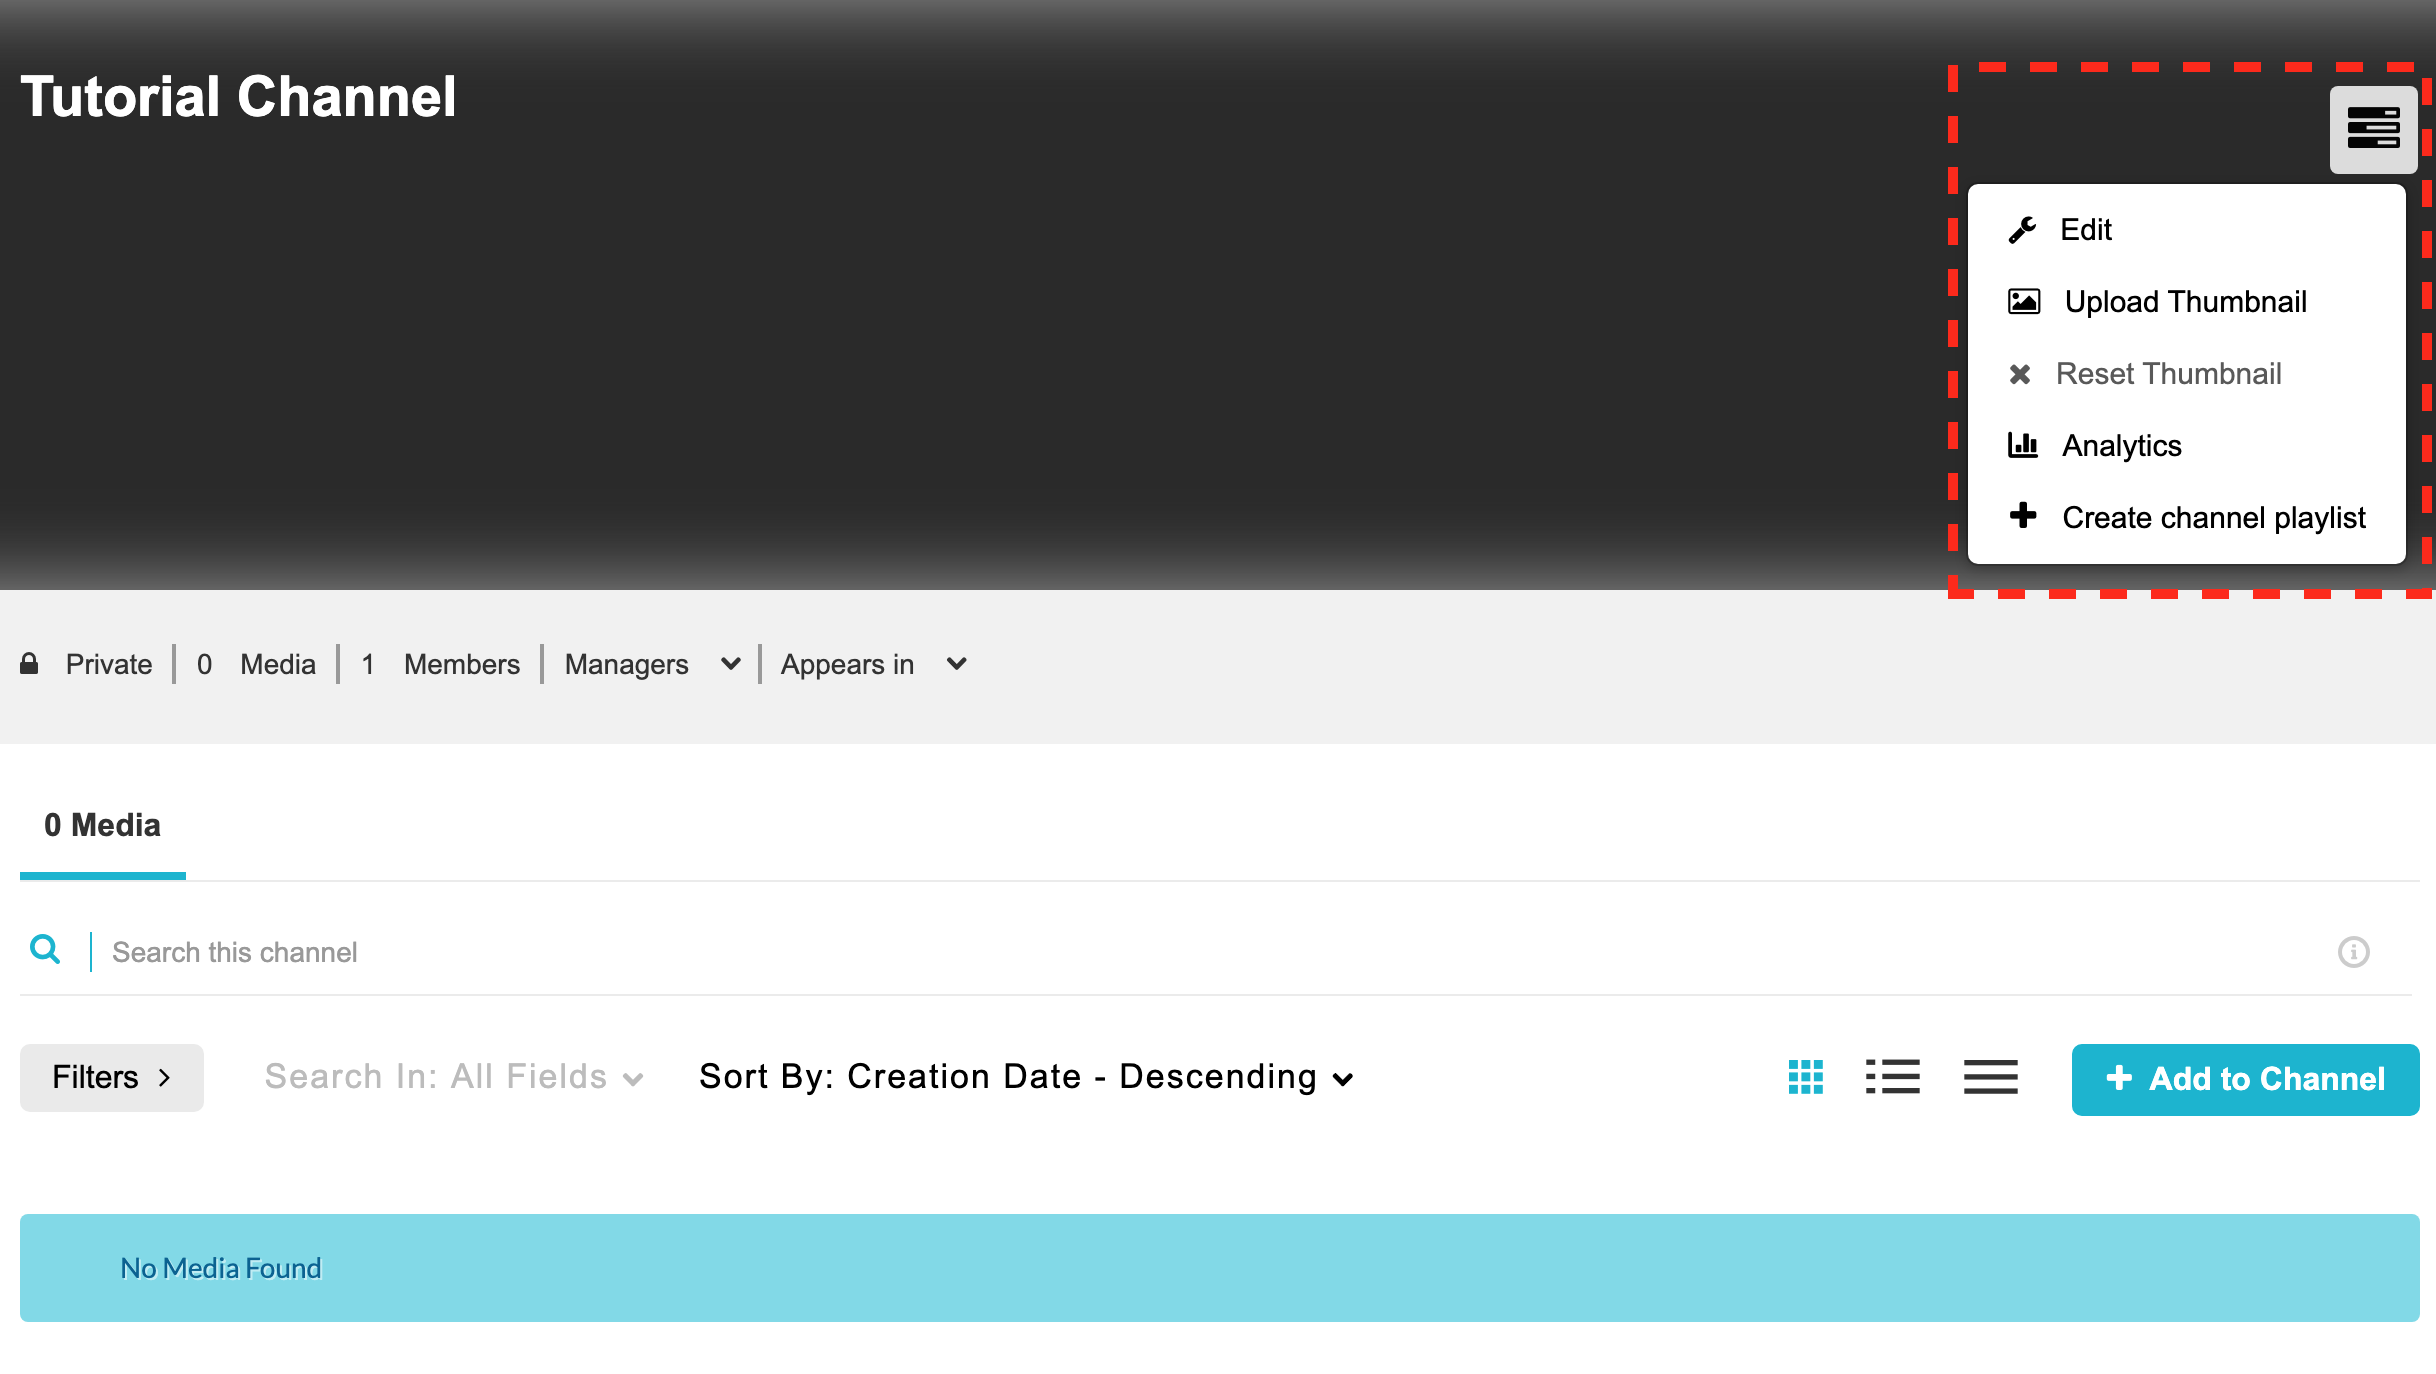
Go to the channel and click on the edit menu icon on the top right hand corner. From here you can:
- Edit: change your channel details, create and edit channel playlists, add and remove users to channel
- Upload Thumbnail: this changes the grey banner to your own uploaded image
Note: once you add a video to your channel the banner will default to a thumbnail of that first uploaded video - Reset Thumbnail
- Analytics
- Create a channel playlist
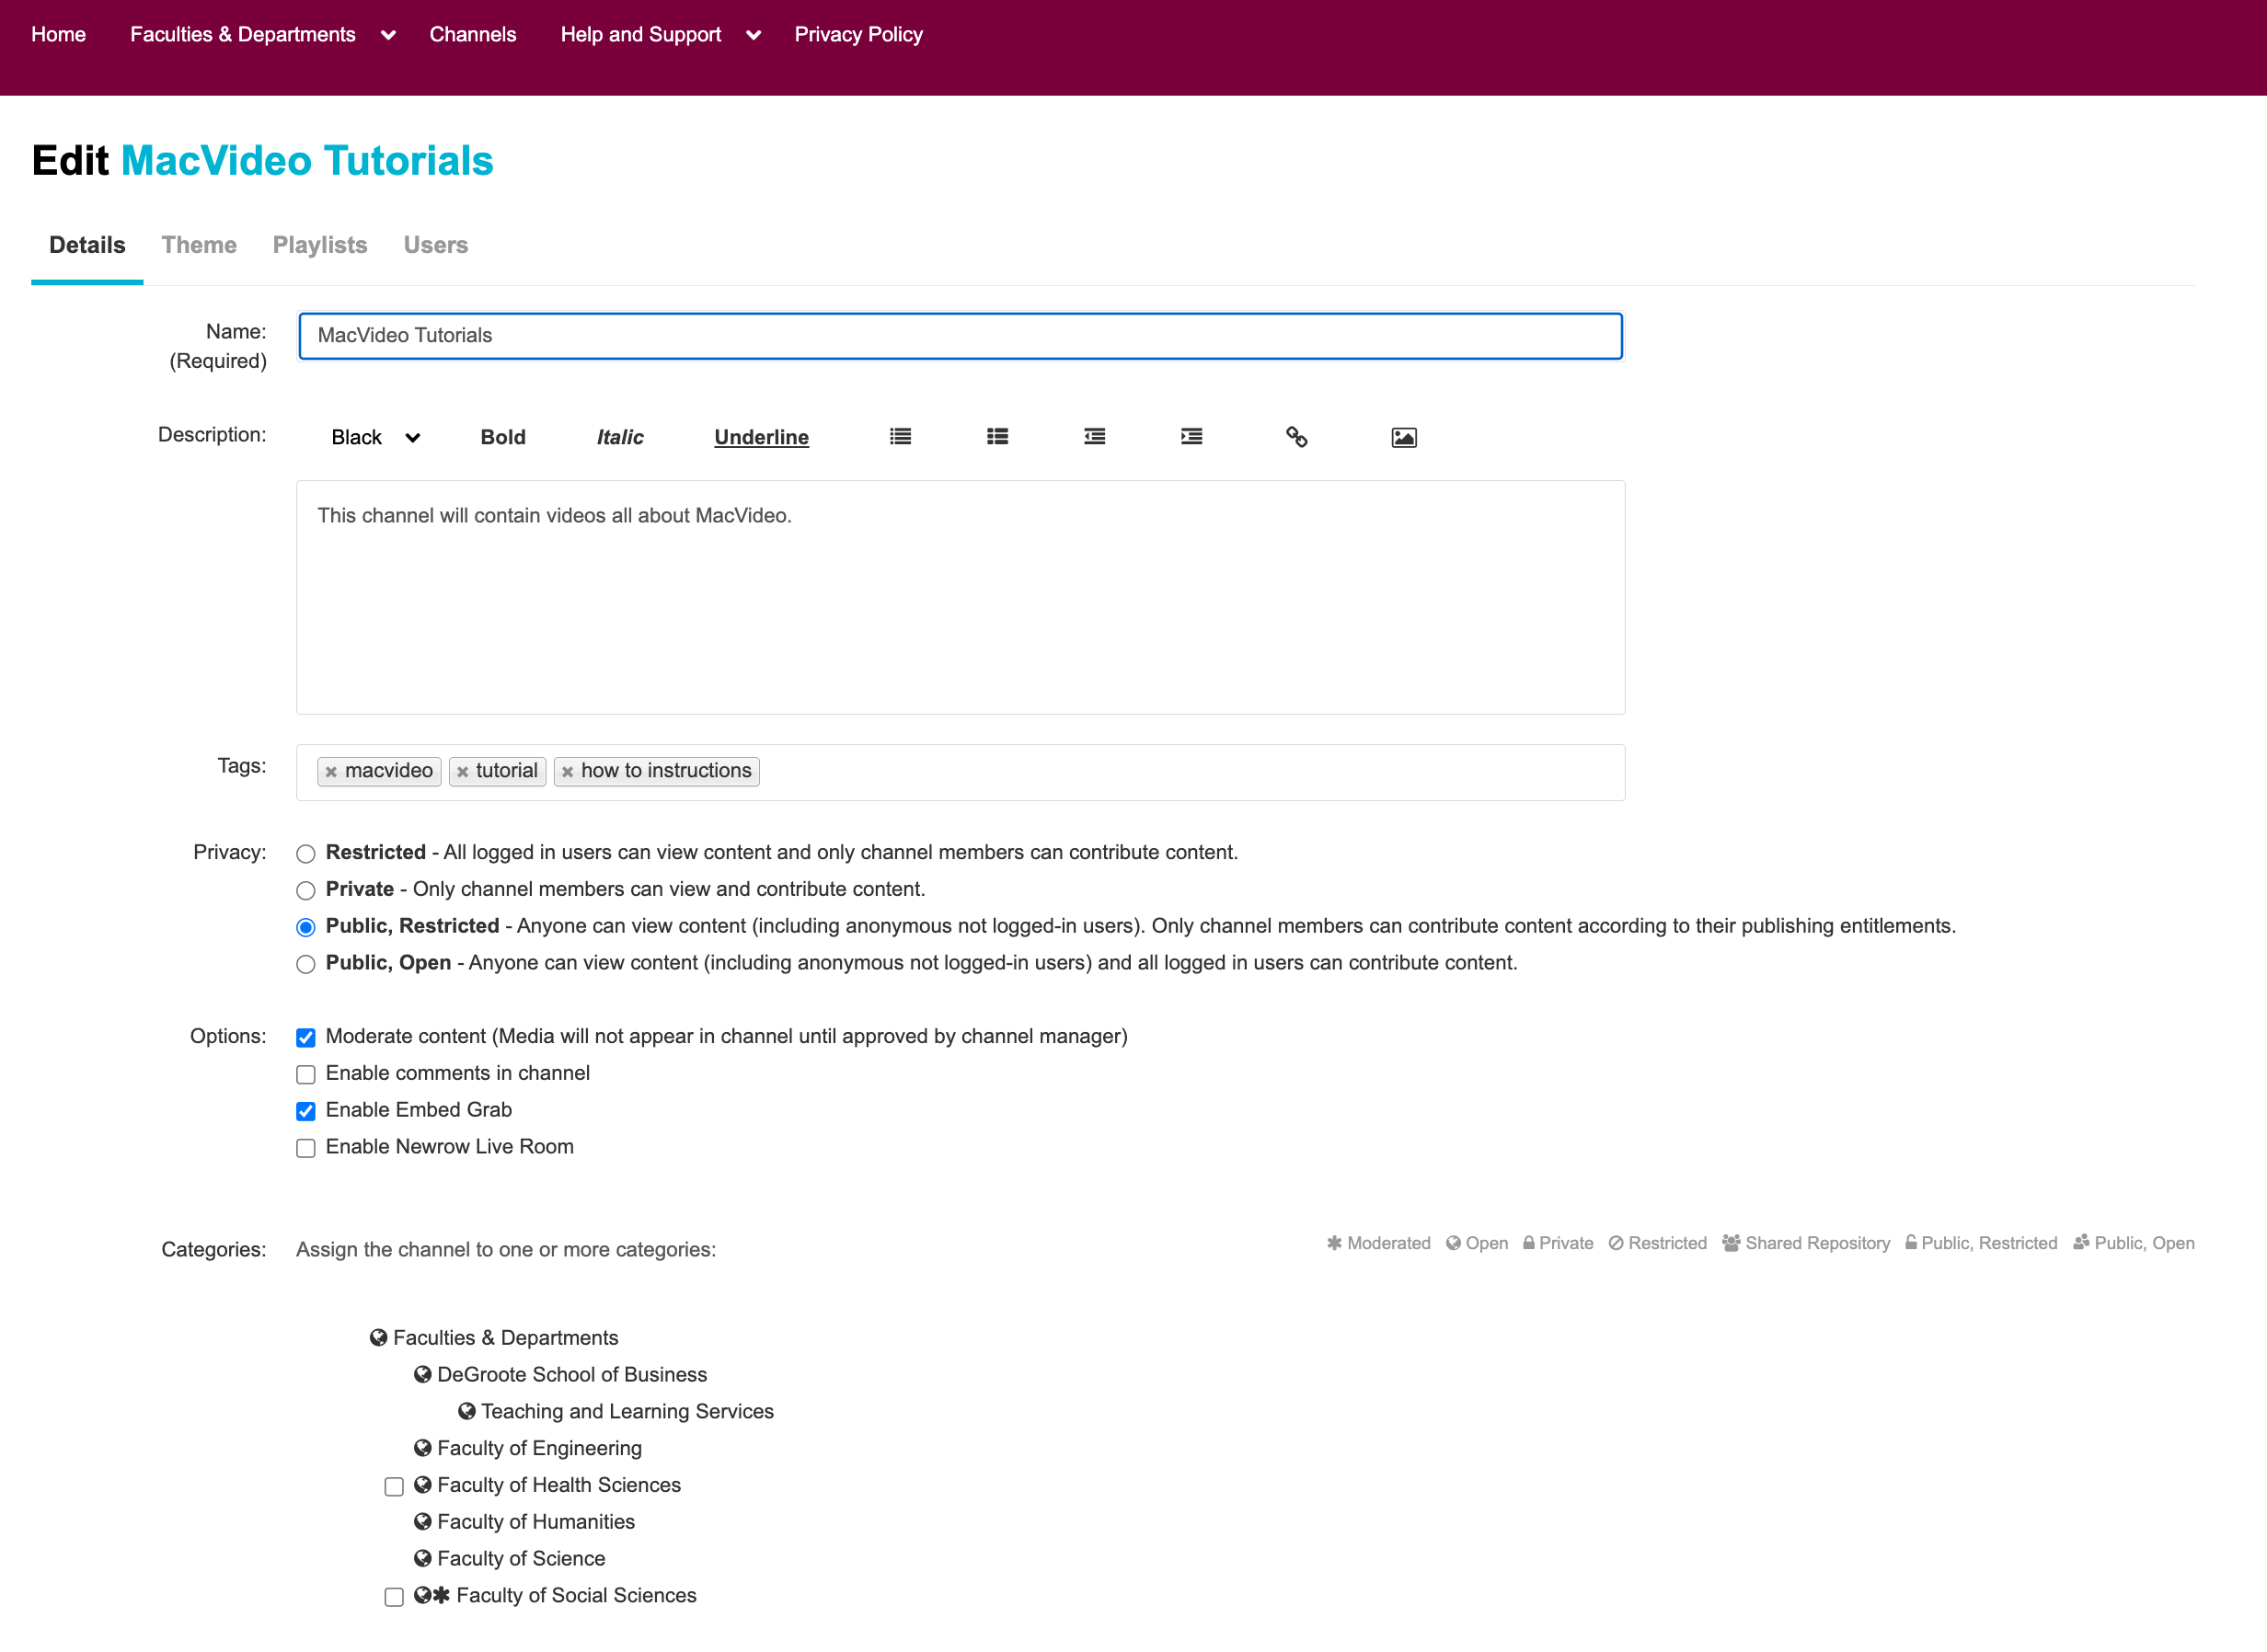
 This is what the Edit Channel page looks like. It’s the same page for the channel details when creating a channel.
To view more in-depth information about all the options Channels provide, visit: https://knowledge.kaltura.com/help/managing-a-channel-in-kaltura-mediaspace.