
MacVideo now has the capability of creating videos with branching pathways. Kaltura Interactive Video Paths will give you the ability to add choice-based learning paths to your videos, inviting your viewers to engage and participate in unique ways. With Interactive Paths, you can customize your content to create a “choose your own adventure” experience for each of your viewers. You can create, share and embed video paths in your website and Avenue to Learn.
It’s important to note that right now if you plan on using the interactive video path tool for your video, you cannot combine it with video chapters or video quizzes.
To view a video branching example, view the video below on how to upload content:
How to Create
In this section we will describe the steps on how to create an Interactive Video Path video and pre-select the media you want to use for the Interactive Video. Make sure that you have carefully planned the structure and navigation of your interactive video and have the separate videos uploaded and captioned beforehand.
To create an Interactive Video Path
- Login to MacVideo.
- Select Interactive Video from the +Add New menu.


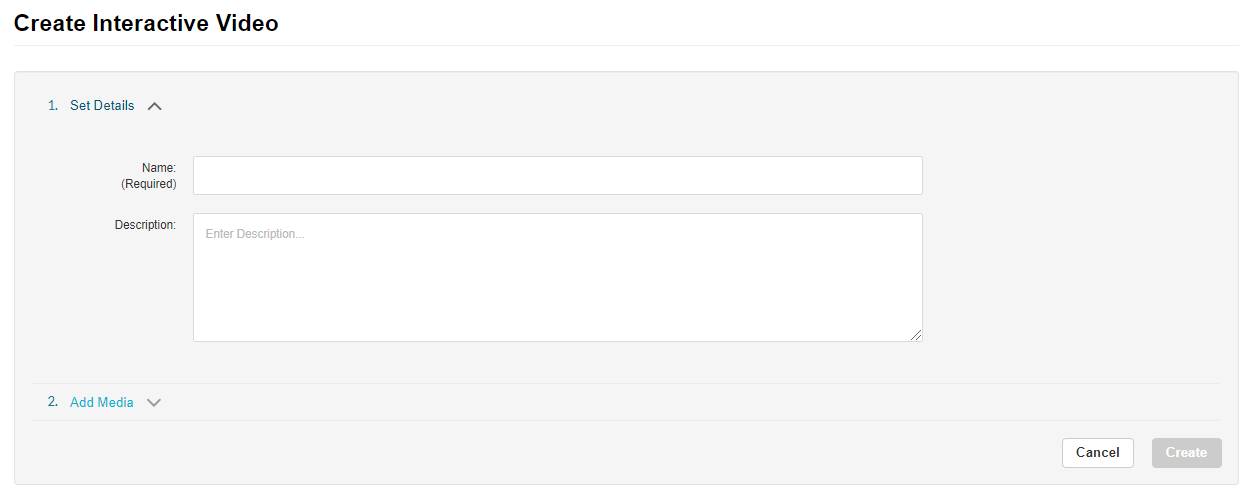
The Create Interactive Video window is displayed and includes two sections:
- Set Details
- Add Media
To create the Interactive Video
- In the Set Details section enter a Name (required) and a Description which is optional.

- Click on the Add Media arrow to open the My Media section.
My Media displays the media available in your account to select to use for the Interactive Video. Click the blue Add button next to the videos you want to appear in the Interactive Video. (note: you must wait until the captions are completed on each video if you want the captions to appear in the interactive video). Once your selected video is added, they will appear in the right hand column and the blue Add button will turn green.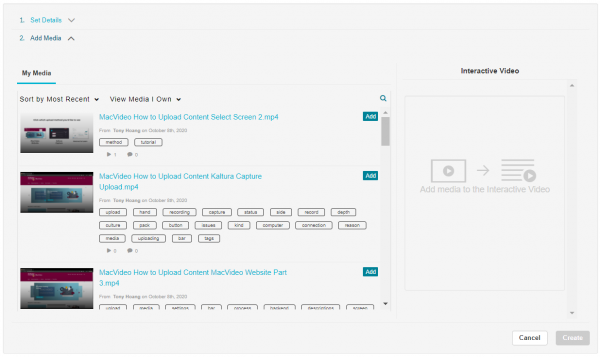
- Click Create.
The Interactive Video Node Map is opened.
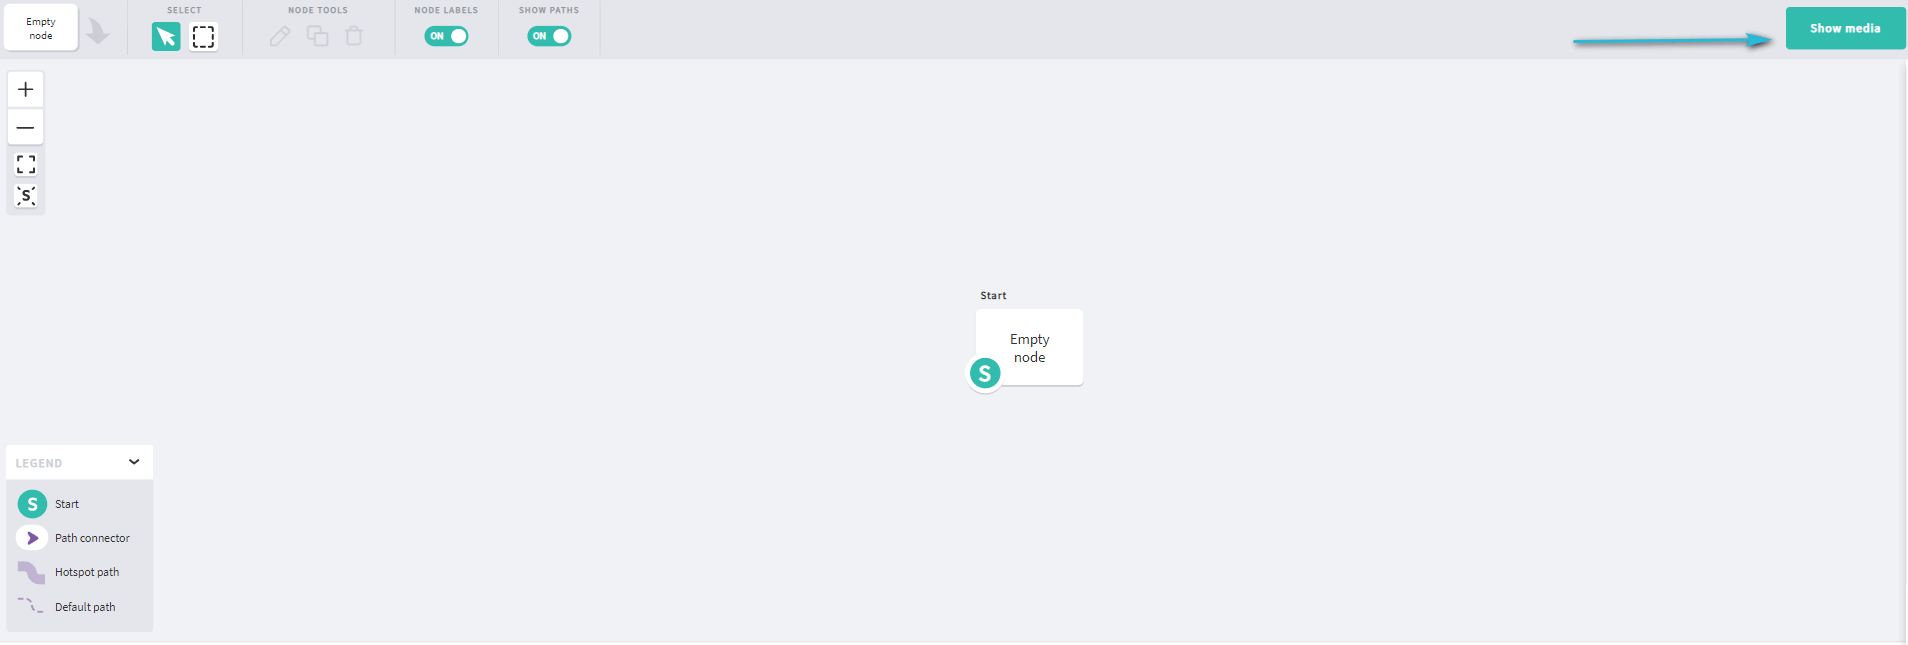
- Click Show Media.
Click the Show Media button on the far right hand side of the page. The media library that contains only the videos that you selected is displayed.
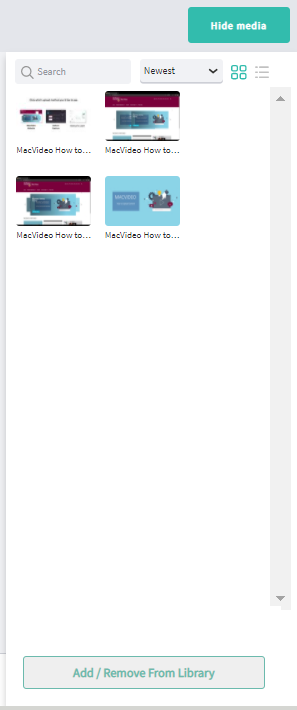

You can create Interactive Videos using only the chosen videos in the library.
Click Hide Media to Hide Media in the Composer.
To Edit the Interactive Video Playlist
- Click Add/Remove from Library to return to the playlist User Interface
The Edit Interactive Video window is displayed. - Click on the x to remove media.
- When you are certain about the media in your playlist, click Save to return to the Interactive Video Composer with a refreshed list.
There is no need to turn entries into ”unlisted” status in MacVideo to be used in Interactive Videos.
Using the Node Map
The node map is the main area of the Kaltura Interactive Videos editor. This is where you build out the structure of your interactive project. All projects begin with an empty start node that is ready to accept media.
As your project expands, the node map can be positioned to show different parts of the branching structure. You can zoom in and out using the slider in the upper left, and you can move to different areas of the project by clicking and dragging the node map itself.
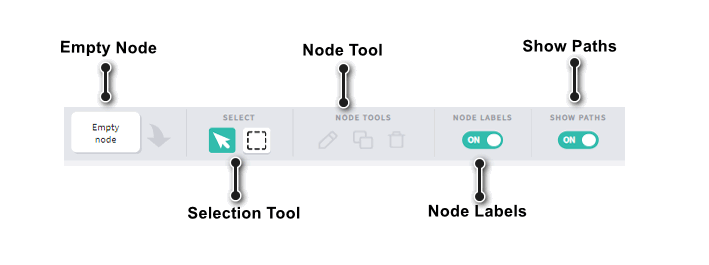
Empty Node Tool
Empty nodes can be dragged onto the node map and act as placeholders as you build out your project structure.
Selection Tools
Similar to video editing software, the node map has both pointer and marquee tools.
- Pointer: Use this to select single nodes or branches on the node map.
- Marquee: Click and drag over an area on the node map to select multiple nodes and branches.
Node Tools
- Edit: Select a node and choose “Edit” to bring up the node editor. Nodes can only be edited one at a time. Double-clicking on a node will provide the same functionality.
- Delete: Select a node and choose “Delete” to remove the node and any associated media from the node map. You can also select the node and press the delete key to achieve the same result.
Node Labels
Toggles the names above the nodes on the node map.
Show Paths
Toggles the display of paths between nodes on the node map.
Creating Your Project Structure
Kaltura Interactive Videos are composed of nodes. Each node acts as a container for a video. The Node Map is where you will lay out the and edit the main structure of your branching video. The node map is made up of the editing canvas and toolbar to help build out your project efficiently.
- Begin building out your project layout by clicking and dragging empty nodes onto the node map.

Pro Tip: It is helpful to name the nodes with intuitive names as you place them on the node map. You can edit the node name by clicking on it. This will save you time as you get deeper into the project build.
To create the paths of your video
- Hover over the right-hand side of each node and drag the arrow to the node or nodes it should connect to.
You can connect the node to any other node on the node map, even itself! You can also create multiple connections from one node. Every path you create will automatically add a hotspot to the origin node that can be easily styled and positioned within the node editor.
- Open the media library and drag your media onto the desired nodes.
- Double-click on a node to begin editing your hotspots (see Hotspot Editing).
If you already have your media, you can skip step one and drag the clips from the media library directly onto the node map. From there you can change the node names, and create the paths between the nodes.
Returning to the Node Map Editor
If you have exited the node map editor, there are two ways to return and continue to edit your interactive video.
- Click on the User menu and select “My Media. Select the Edit icon next to the Interactive Media project entry.
- From the Media Entry page, click on the Actions menu and select “Edit Interactive Video.”
Creating Hotspots (Navigation)
Creating hotspots on your video is the primary way to add the navigation and interactivity to your video. Hotspots are contained in the interactive layer of the MacVideo player and are primarily used to trigger new videos and URL link-outs. These function similar to the regular hotspots you can add to your videos in the regular MacVideo video editor. These hotspots can be created as buttons for the navigation points in your video. You can also have your navigation menu already pre-rendered in your video and simply make a hotspot transparent if you do not wish to have a typical hotspot button for navigation.
There are two ways to create hotspots in the MacVideo Interactive Video Composer.
- You can link the video to other nodes on the node map. This automatically generates hotspots for each connected node. These hotspots will be stacked in the upper left-hand corner when you double-click into the node editor. You can edit and delete these app-generated hotspots. If you are planning to create more detailed custom hotspots, it is recommended to create them manually instead of linking the nodes first.
- You can manually add hotspots to your video. Double click on a node on the node map or use the hotspot tools to draw or duplicate hotspots.
To draw, click the “Draw Hotspot” icon and click and drag the hotspot onto the video. The GIF below demonstrates creating a hotspot on the title of the slide.
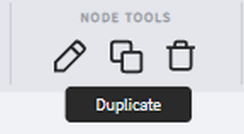
Copying Hotspots
Copying/pasting hotspots is simple. Select the hotspot you want to copy, and then either click the Duplicate icon in the toolbar or use the familiar controls CTRL + C on PC and Command + C on Mac to copy, and CTRL + V on PC or Command + V on Mac to paste.
You can also use the keyboard shortcuts to copy and paste hotspots across nodes.
Changing the Hotspot Appearance
Adding or Changing Text
Double-click within the hotspot to add or edit text.
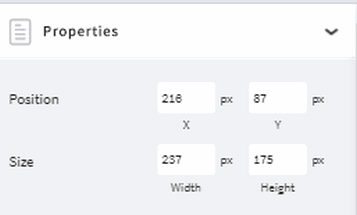
Size and Positioning
You can place the hotspot wherever you like by clicking it and dragging to the location where you want it to appear. To resize, select the hotspot and choose any of the eight handles (appear as white boxes, similar to resizing shapes in Powerpoint) to click and drag. If you want to be precise, both of these attributes can be set at the pixel level in the properties panel on the right-hand side of the screen.
You can add guides within the node editor to help maintain the same hotspot positioning across your experience. Click the ruler to add guides to your nodes, and click on the “x” to remove. These guides persist across nodes until you close them out, refresh your browser, or begin a new user session by logging out and back into your account.
Appearance
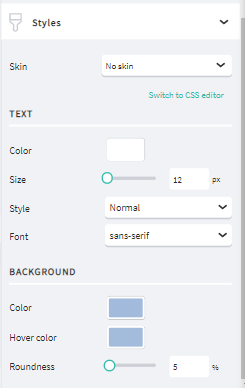
There are several options in the Properties panel that can help you customize your hotspots to suit your needs. Color pickers are available for the text and hotspot backgrounds, allowing you to select any colour or add colour through Hex and RGBA. To make your hotspots transparent and create invisible clickable overlays, you can enter “0” in the A field or move the opacity slider over to the left.
Other options available to style your hotspots are: text pixel size, text style, background roundness, and hover state toggle.
Hotspot Skins
Hotspot styles can be saved as custom skins and then used to change and update other hotspots quickly.
To customize a hotspot skin
- Click on a hotspot and click on the Styles section.
- Click the dropdown next to Skin and select Create new skin.

- Enter a Name for the new skin.
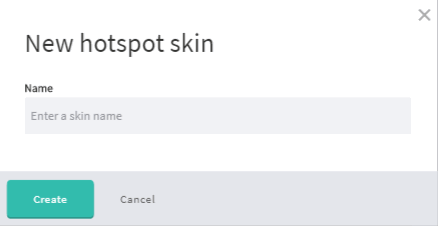
- Modify the skin style ( select the attributes for the custom skin) and click Save.
After you save, you can add the customized skin to any hotspot in your project with which you want to share a style. If you need to update a style on a skin, you can make the adjustment and the update will apply to all hotspots in the project sharing that skin.
Changing the Hotspot Behavior
You can change how your hotspot functions under the Behavior section of the properties panel. Here is where you decide what happens when a viewer clicks the hotspot. These behaviours are reflected in the paths that connect each node that are viewable in the node map.
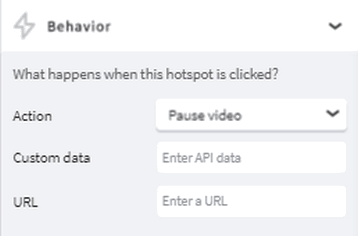
Changing the Actions
There are three options in the “Action” drop-down menu:
- Instant Jump: Instantly jumps to the node listed in the destination field.
- Pause Video: Pauses the video when the hotspot is clicked. This is useful when using a Custom URL Linkout.
- No action: This is useful for adding text to your video.
Custom URL Linkouts
Custom URL link-outs may be used to open a new tab and load a specific web page.
To open a web page from the hotspot
- Enter a URL link in the URL field.
The video will pause. The viewer can explore related information without missing any video content. Please follow this format: http://www.example.com
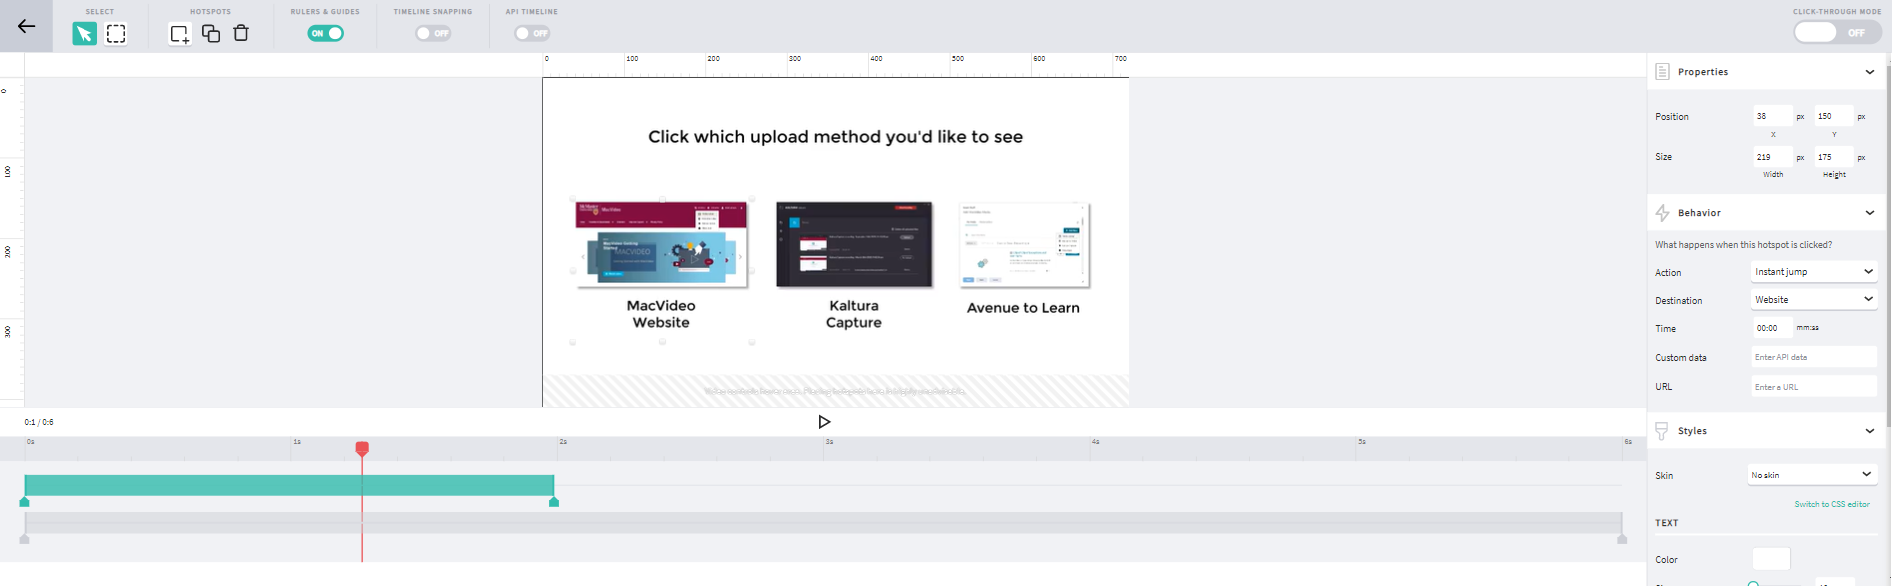
Timing
You can set when and how long your hotspot appear in your video. You control when the hotspots appear and disappear during video playback. Each hotspot has a corresponding timeline below the video. The anchors (small triangles on the bottom) on the left and right of these timelines are draggable.
To set a hotspot to appear at a specific point in the video
- Press the Play button and pause it where the hotspot should appear.
- Click on the hotspot. It turns green.
- Drag the handlebars/anchors of the start or end points with your mouse to set the range of the hotspot display. Drag the left anchor to the red line that descends from the playhead. Drag the right anchor to the appropriate time in the video for when you want the hotspot to visually disappear.
You can use the Timeline Snapping feature to line up your anchors across hotspots.
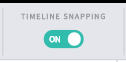
With the Timeline Snapping toggle on, dragging a timeline anchor anywhere close to another timeline anchor causes it to snap to the exact location. This is useful if you want hotspots to appear at the exact same time.
When creating or editing a Kaltura Interactive Video project you may want to view the current status of your project structure and see how you set up your media for your viewers. Click-through mode, allows you to easily preview and iterate your project from within the node editor rather than having to build and exit the project to view it in its current state.
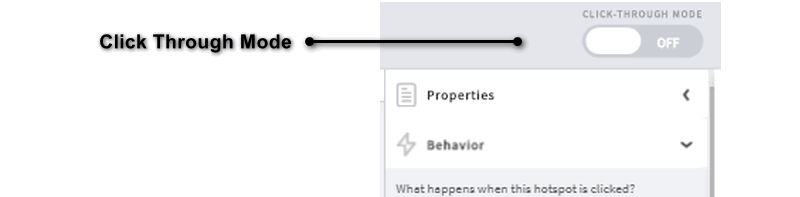
The Click Through Mode toggle is located in the upper right of the node editor. When set to on, you can watch the project in its current state from the current node. All editing options will be unavailable while in Click-Through mode. You can turn Click-Through Mode off at any time, at which point the editing options will become available on the current node.
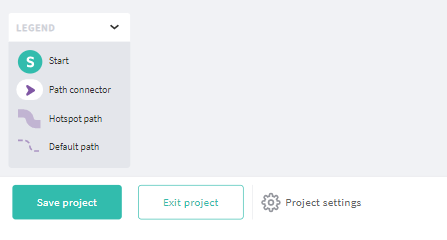
Saving Your Project
After you complete building your project within the node map, click “Save Project” in the lower left corner of the screen to save your project in MacVideo. Remember, this tool is browser space so if you close or exit the browser without saving you will lose your changes. There is a prompt that will appear when you try to close the tab or browser before saving.
Viewing Your Project
- Navigate from the Node Map to the User menu. Make sure to save your project, then click Exit project.
- Select My Media and filter the media to display Interactive Videos. The list of the interactive videos in your MacVideo account is displayed.
- Click on the thumbnail image or the name of the interactive project. The Media Entry page is displayed.